USER GUIDES
- Sending Letters with the PostGrid Print & Mail Dashboard
- Overview
- Integrations
- Live and Test Modes
- Creating Templates
- Directly using HTML
- Navigating the Template Editor
- Adding Variables to Templates
- Using PDFs
- Formatting Concerns
- Creating Contacts
- Creating Multiple Contacts
- Test Mode Contacts
- Creating and Sending Letters
- Sending Individual Letters to Contacts
- Sending Letters with Variable Data
- Sending Letters to Multiple Contacts
- Tracking Letters
- Letter Progress
- Previewing Letters
- Cancelling Letters
Sending Letters with the PostGrid Print & Mail Dashboard
When your business requires sending mail in an effective in scalable manner, PostGrid has your solution. In this guide, we will examine how to send letters and create templates using the PostGrid dashboard as well as how you can use the API to send letters automatically.
Overview
There are four stages in the process of sending letters with PostGrid:
– Creating and designing templates
– Creating Contacts
– Sending letters
– Tracking letters and other analytics
Whether you have a small operation with no developers or a large operation with engineers on hand, each of these three stages have tools at a variety of different levels to accommodate. In this guide, we aim to show you how you can use either our dashboard each of these four stages and how you can safely test out your workflow.
Integrations
PostGrid may also offer integrations with your CRM or automation service of your choosing, though this guide will only go over our dashboard. Reach out to our team to see if we currently offer such integrations and if not, we’d be happy to expand our reach. PostGrid also comes with a feature rich API, where you can find our documentation here or follow this exact guide but for the API, which can be found here.
Live and Test Modes
To make sure that your customers are receiving the exact letter you wish to intend, PostGrid offers both a test mode and a live mode. In test mode, actual letters are not sent out but the process of creating orders is completed all the same. This allows you to ensure that variable data is assigned properly and when you preview a letter, it adheres to postal standards and looks exactly as it should. When you are ready to actually send the letters, you can switch to live mode and repeat the sending process with everything set up as before. Letters sent in test mode will not be delivered, _even after switching to live mode_. More details on these features will be discussed below.
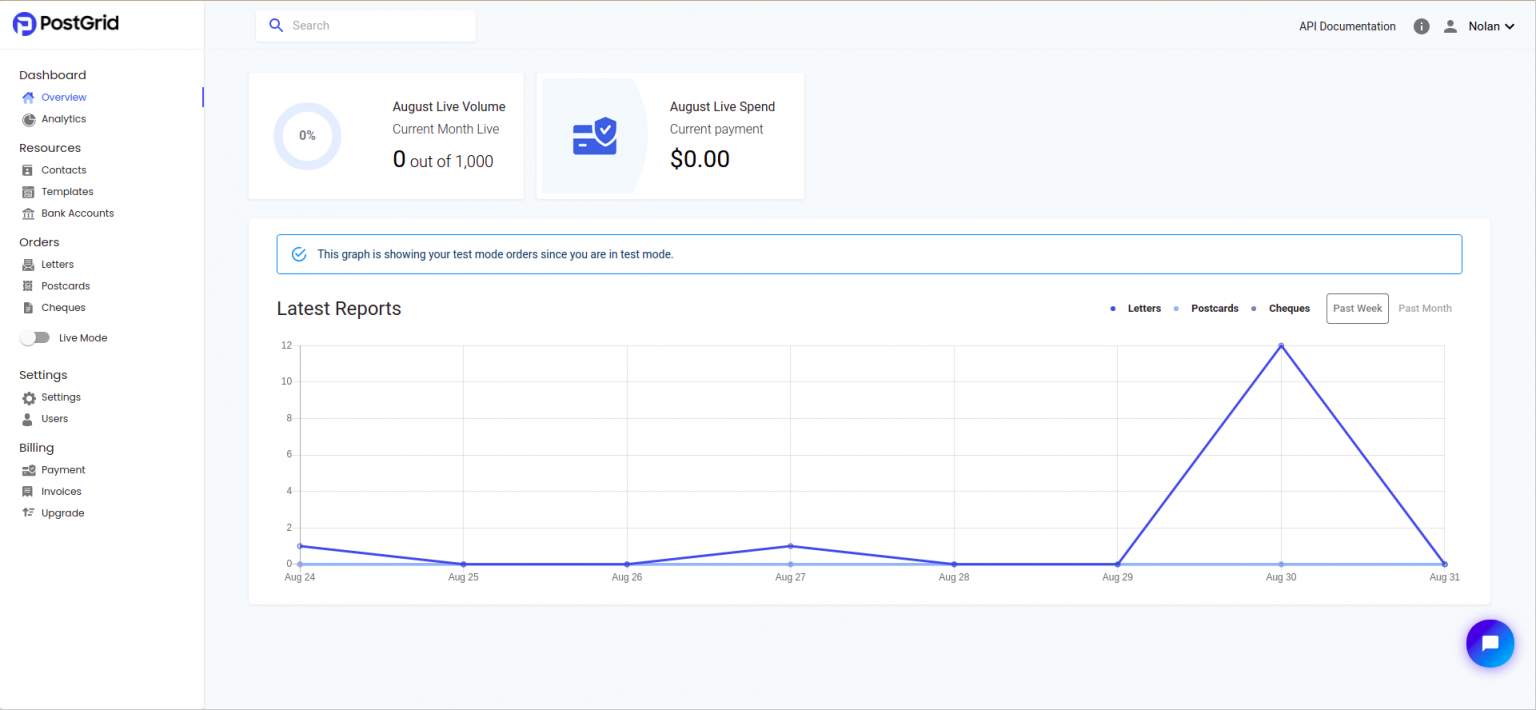
To swap in and out of live mode, you may toggle the switch found on the left side and pictured below.

When the switch appears grey as it does in the image, you know that you are in test mode and are free to use the dashboard without worrying about sending actual mail.
Creating Templates
We begin our process right at the dashboard after logging in.
Though there are certainly some analytics we will get back to, we are interested in creating a letter. If you already have a PDF you wish to send, you can skip the next three sections. Otherwise, you are going to need to create a _template_ for your letter.
Templates serve as the foundation of the letter and can be customized as much as you wish, even including variable data such as names or email addresses just to name a couple. To create a template, use the navigation bar along the side and click on the ‘Templates’ heading under ‘Resources’.
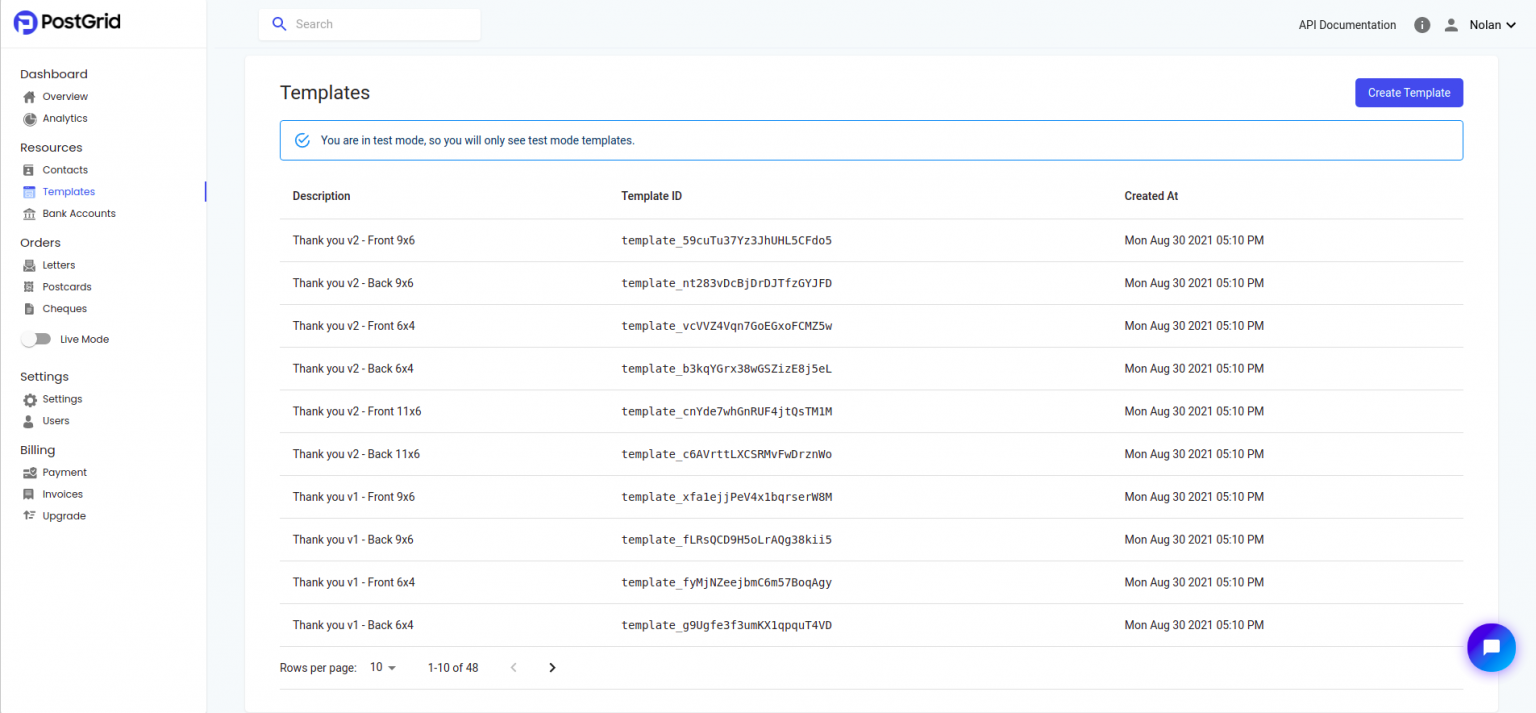
If you have previously created templates, you can find them right here. You can use the search functionality to find templates with certain descriptions, specific IDs, or were created at a specific date. Don’t be too intimidated with knowing the template ID if you don’t plan on using the API, while those that will should remember that they can always find the template ID they need by heading to this page. This page is also useful if you wish to comeback and fix or delete a template, which can be done by simply finding and selecting the template you wish to modify.
Over the next few sections we will go over how to create templates
– Directly with HTML
– Using our built-in editor
– Uploading
Directly using HTML
To create a new template, simply navigate to the ‘Create Template’ button found in the top right.
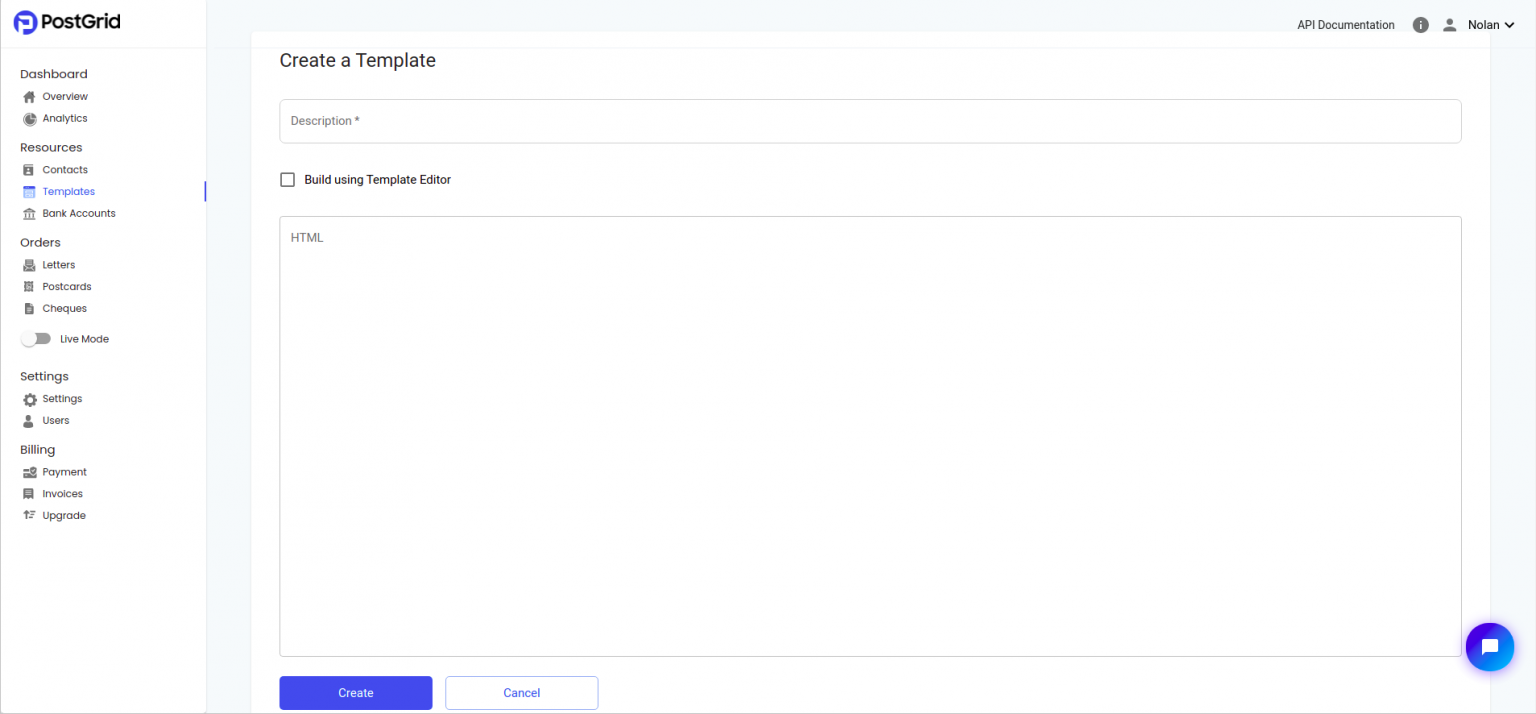
Immediately, we are greeted with the HTML creator. In here, you can insert whichever HTML content you would like to send as long as it is contained in a single HTML file. This would require that any styling must either be done inline as
Keep in mind that this will be converted to print, so use the print preview feature of your browser for an idea as to how it will turn out. PDF previews of actual letters can be found after creation of the letter. There are some other specifications to abide by, and these will be covered in a later section titled ‘Formatting Concerns’.
Navigating the Template Editor
If you don’t have an HTML file available, PostGrid comes with a built-in template editor so you can easily design templates. For an in-depth guide of how to use the editor, read [this guide](../template-editor-guide/TemplateEditorGuide.md).
Adding Variables to Templates
One of the most useful features of templates is the ability to add variable information. To add variable data to a template, simply add a text element and write `{{variable_name}}`, where `variable_name` can be whatever you wish. There are also some preset variables which fill-in based on sender and receiver information such as `{{from.firstName}}`.
Variables may also be added through the HTML editor by including same format within the HTML itself. Variables may also be used to control styling of HTML elements in this way, such as setting
Actually filling in the data is simple enough and we will show you how to do it in the ‘Creating and Sending Letters’ section. During the template creation phase, you only need to worry about adding in which data may vary from letter to letter as you use the template while PostGrid helps you to take care of the rest.
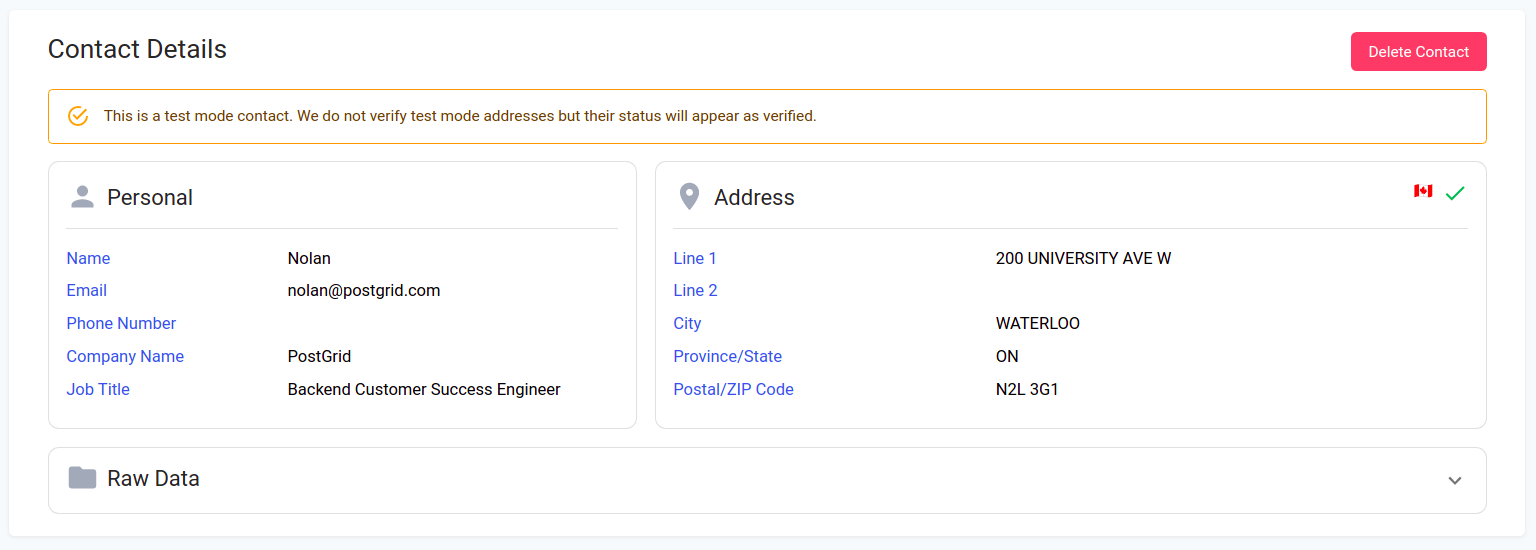
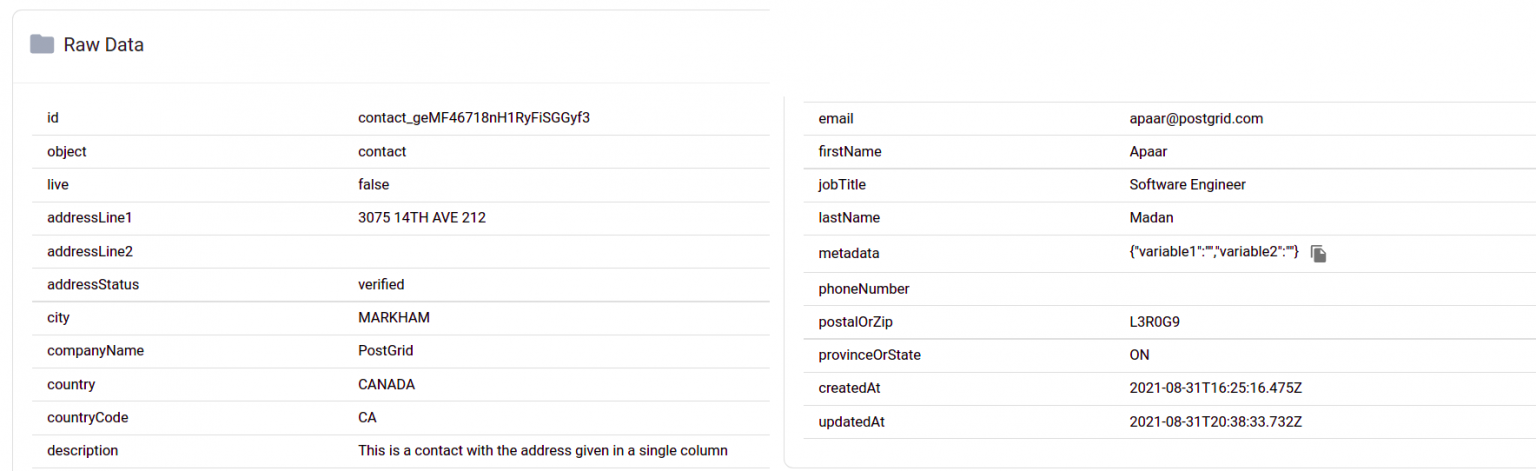
To know which variables can be filled in from contact information, take a look at the details of a contact to see what information is available. Opening up the ‘Raw Data’, here is an example below.

Variables with nested information can be accessed using `variable.nestedInfo`, such as specifying `{{income.afterTax}}` to access the income after tax which may be stored as
More information on variables can be found below.
Using PDFs
If you don’t need to create a template but instead have PDFs already ready to send to specific contacts, then you can move right along to the sending part. However, you will still need to read the following section to be sure of the format of the PDF letters you wish to send.
Formatting Concerns
When sending and printing mail, we need to keep in mind where the address will be placed as well as where the margins can be found. In the official API documentation here, you can find the specifics for Canadian letters and for US & international letters. To avoid having the address cover a specific part of your letter, we will see below how we can add an additional page dedicated to just the address.
Creating Contacts
Before we can get started with sending letters, we will need to specify who the letters are from and who they are going to.
To simplify this process, PostGrid has the ability to create contacts built right into the dashboard. So let’s navigate to the contacts tab which can be found on the navigation bar on the left.
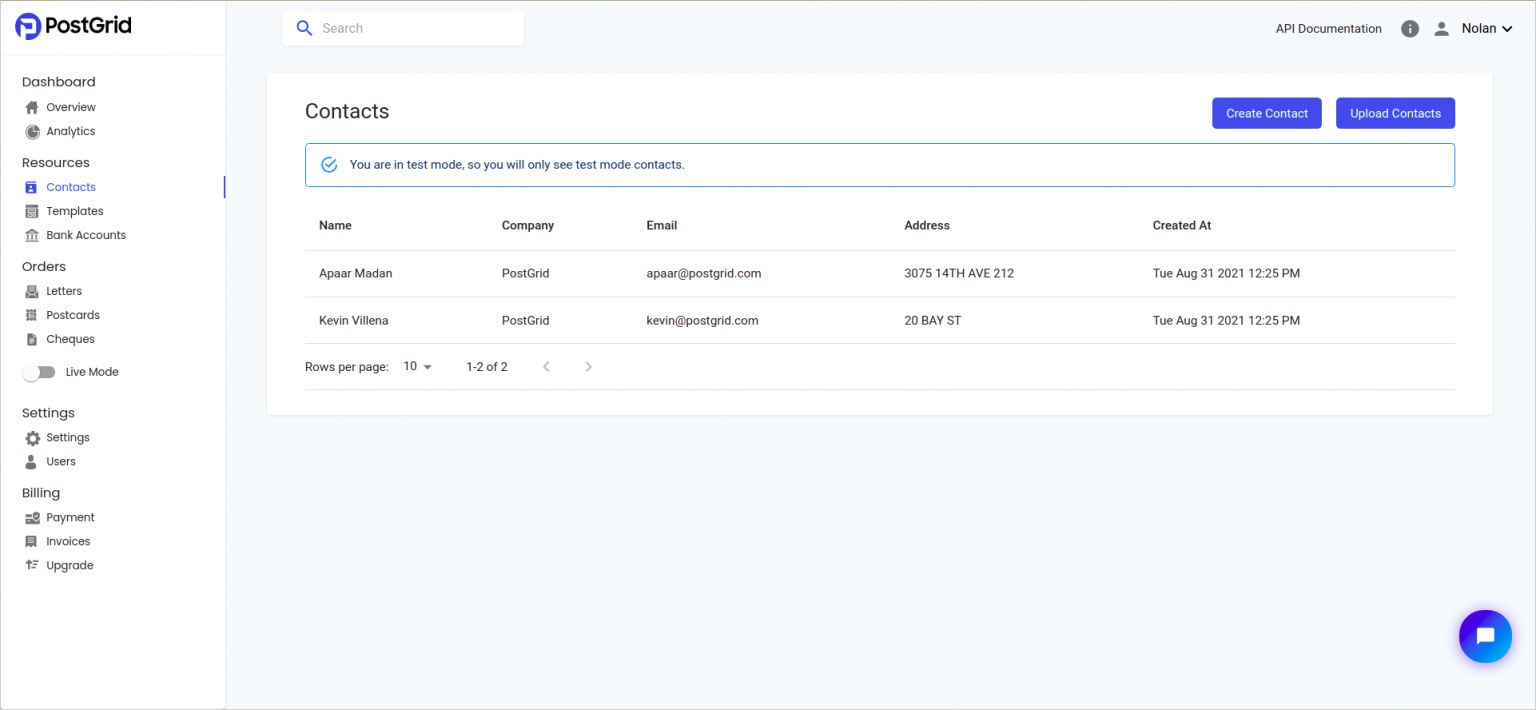
On this page, you can find already existing clients and select them for more information. You may also use the search bar at the top to search for contacts by using any information known about clients including names, company names, or addresses. Let’s use the button in the top-right to create a new contact for myself so that we can send letters.
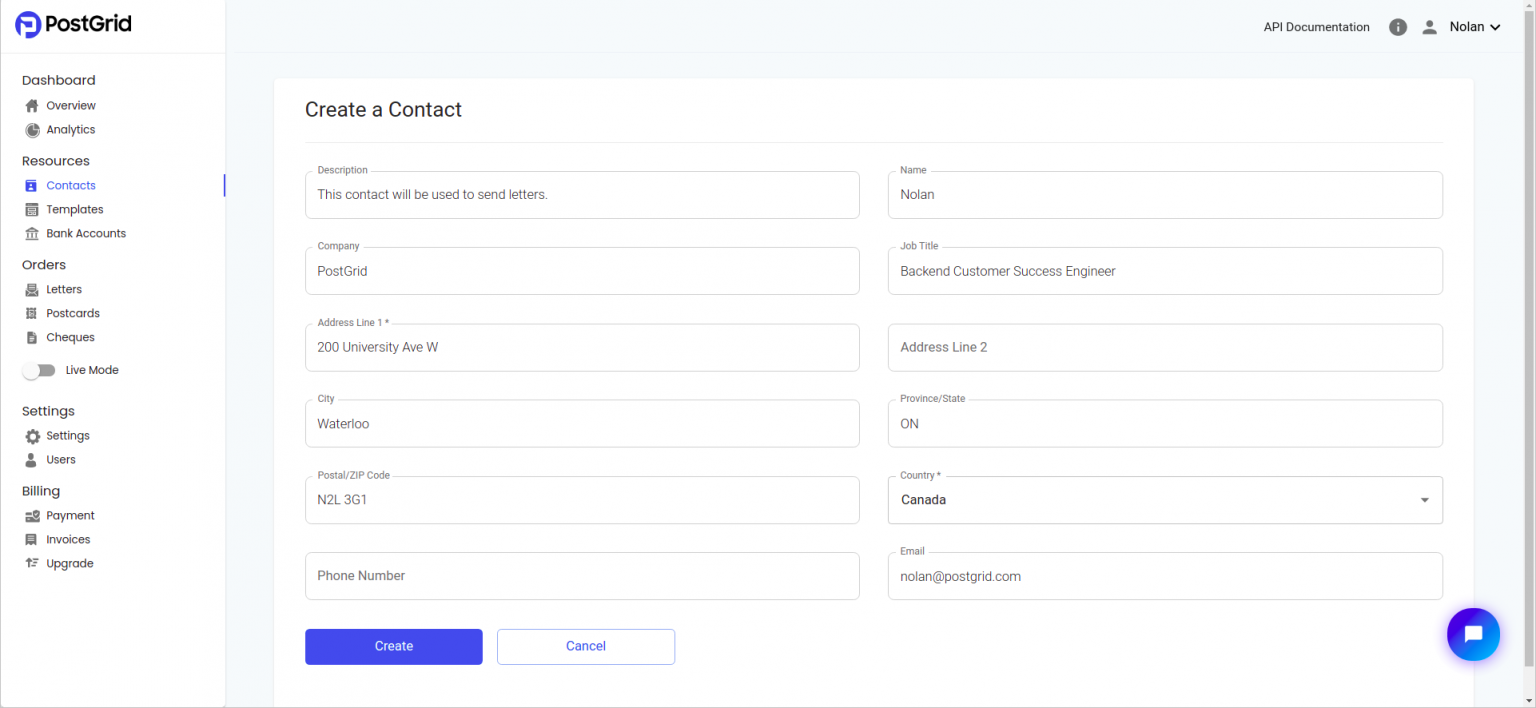
With the appropriate details filled in, we are set to simply hit the create button which will take us back to the page with all of our clients with our newly created contact listed at the top. To change contact information, delete a contact, or see if their address is verified, simply select the contact from the list to be navigated to a page containing these options.
Creating Multiple Contacts
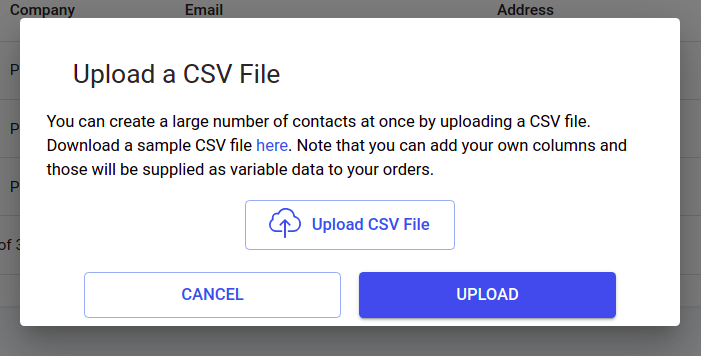
If you have a lot of contacts you would like to upload at a time, we can use the ‘Upload Contacts’ option found on the contacts page. Here we can select a CSV file with our contacts separated by lines. For properly formatting your contact information, see the example found here.
Test Mode Contacts
One part of contacts which is important to differentiate is what it means to be created in live mode or test mode. As we can see by the disclaimer above our contact, a contact in test mode will have their address marked as verified despite not actually being verified. When you create contacts in live mode, PostGrid will verify the address and properly determine whether local postage can deliver to that address.
Creating and Sending Letters
With either your templates or PDFs ready to go, it is time to figure out how to send actual mail. _If you are still unsure of how mail will turn out, please make sure you are in test mode_.
Sending Individual Letters to Contacts
With our contacts created, we are ready to send a letter. To begin, let’s head over to the letters page by using the navigation panel on the left.
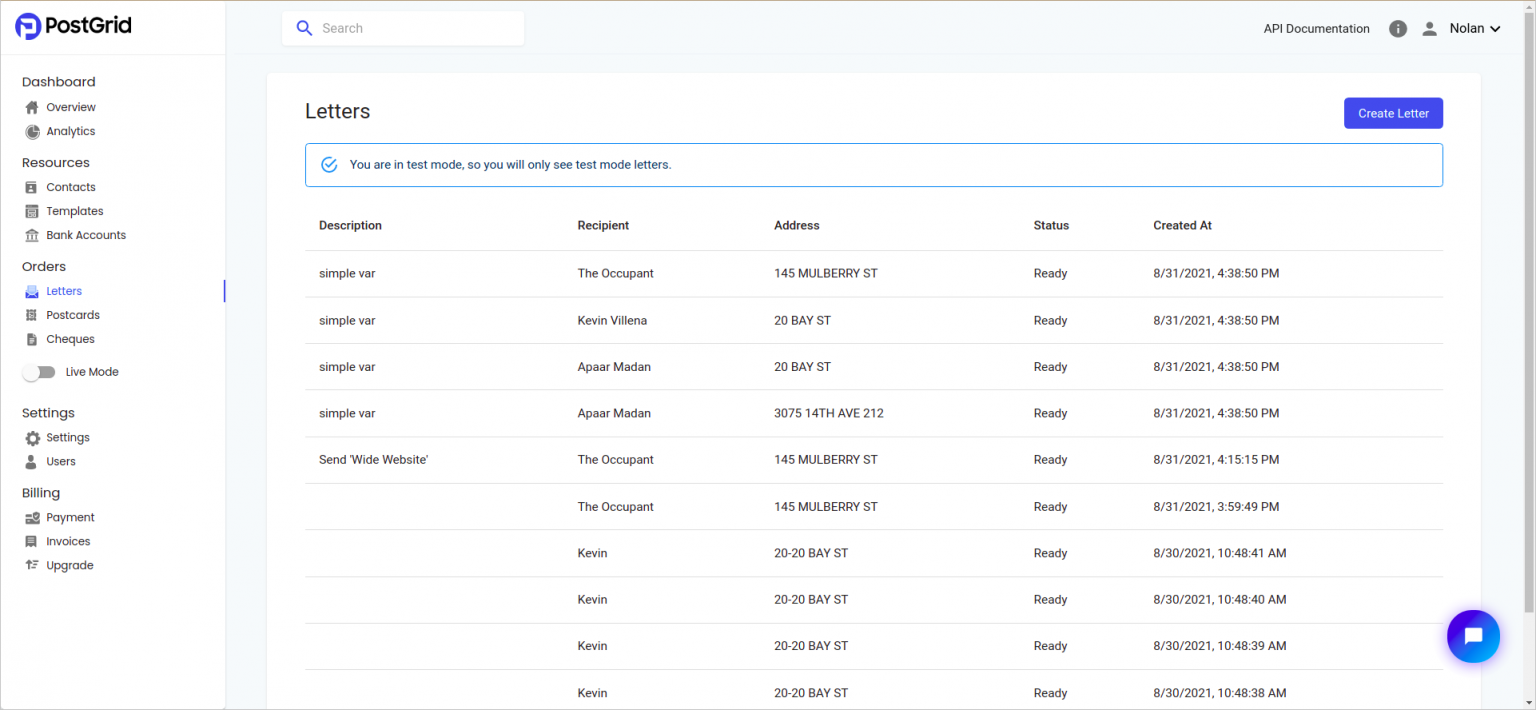
On this page, we find a table of all of our previous letters sent. If we are looking for anything specific, we can use the search bar at the top of the page to find mail sent to particular contacts, at a particular stage, and many more options. To create our letter, let’s click the ‘Create’ button at the top right.
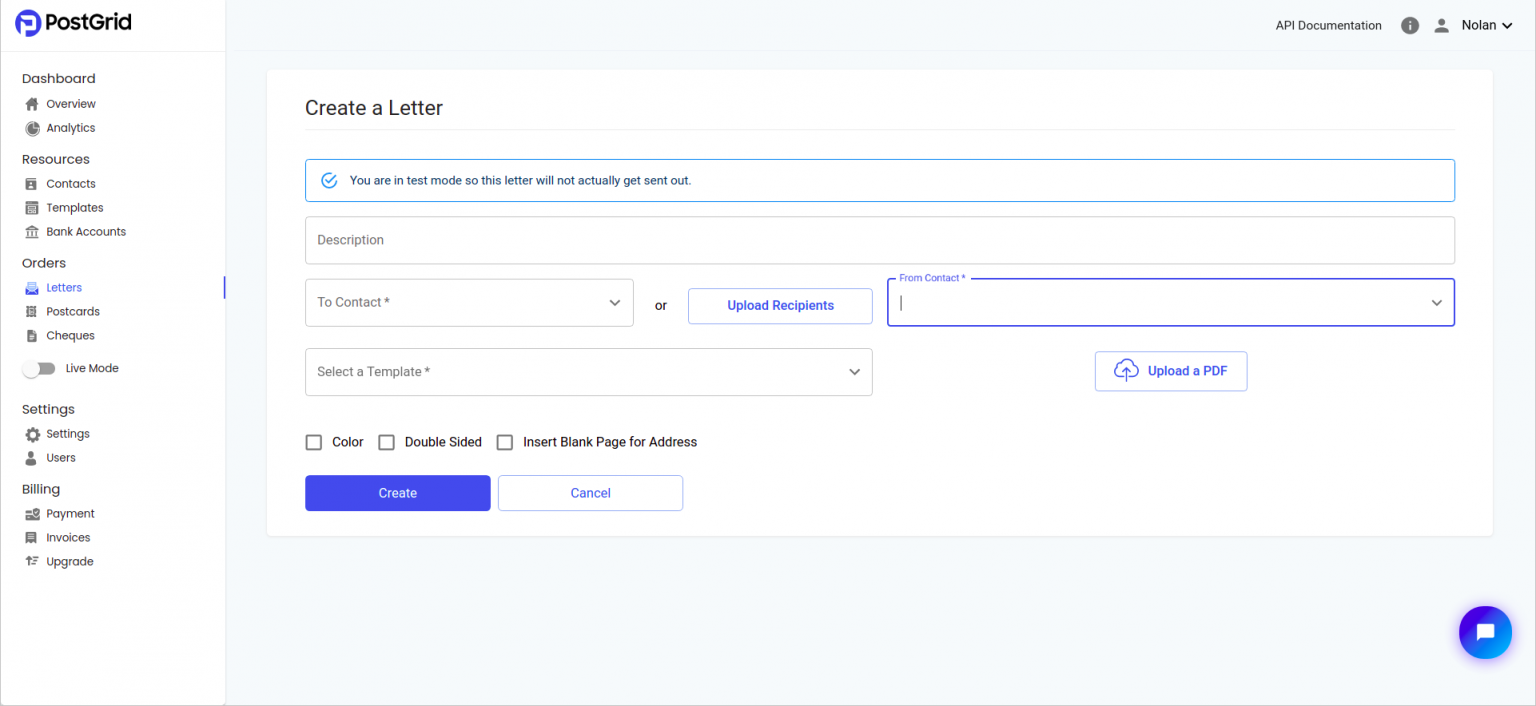
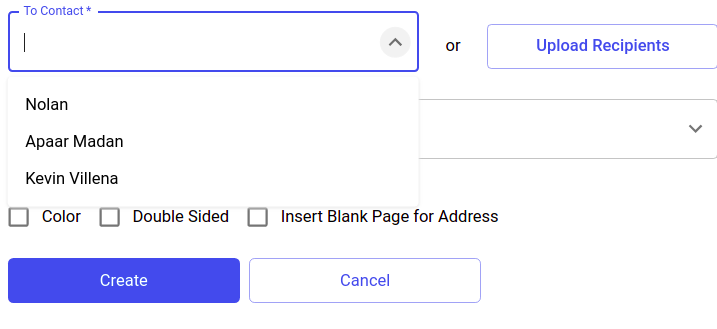
Once we are here, we find all of the fields necessary to fill out our letter, including a template and our contacts. This is why it was important that we cover the creation of contacts and templates before jumping into making our letters. To add contacts, either start typing a name or use the arrow to drop down a list of recently created contacts. We will cover in more detail the ‘Upload Contacts’ option in the next section.
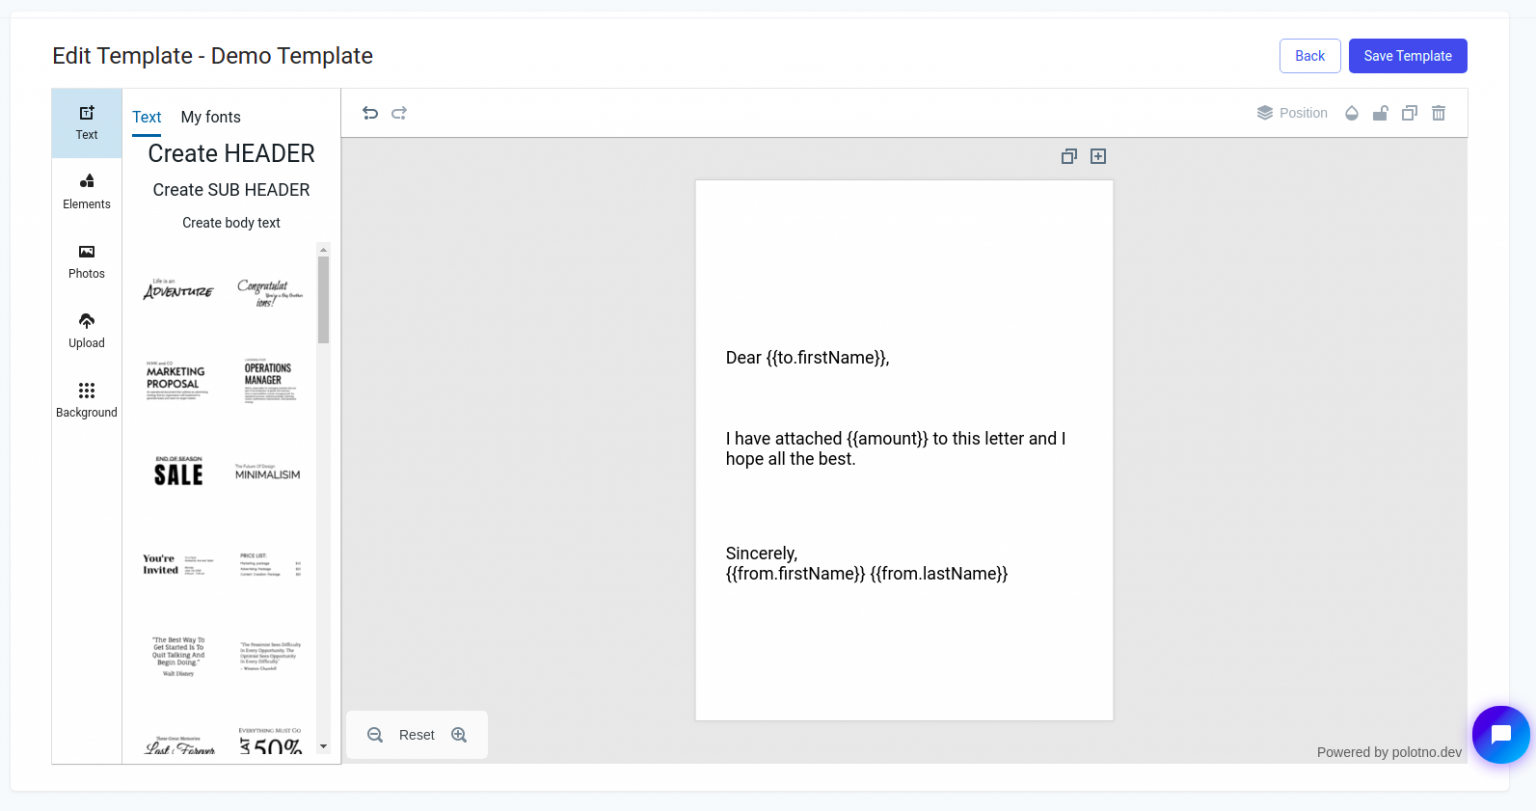
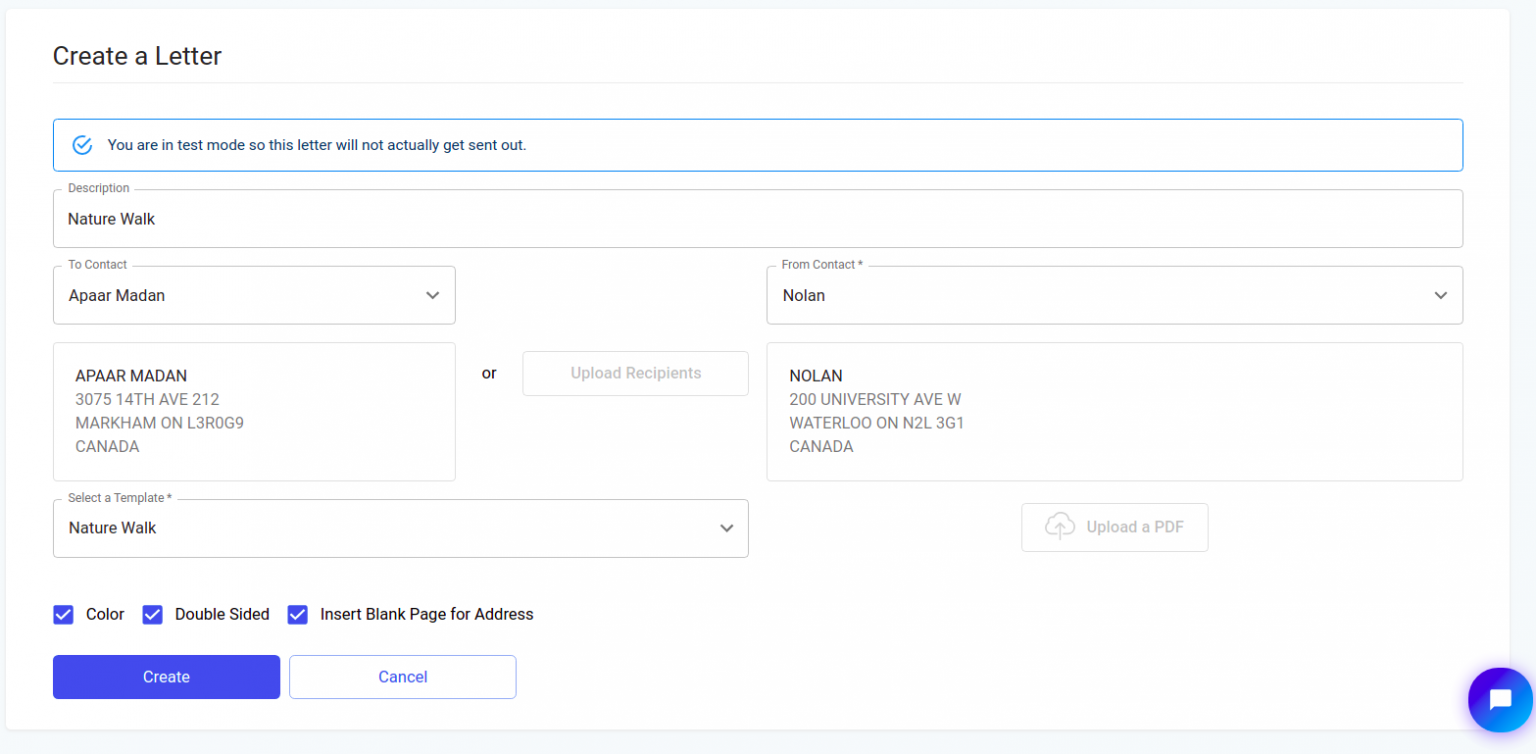
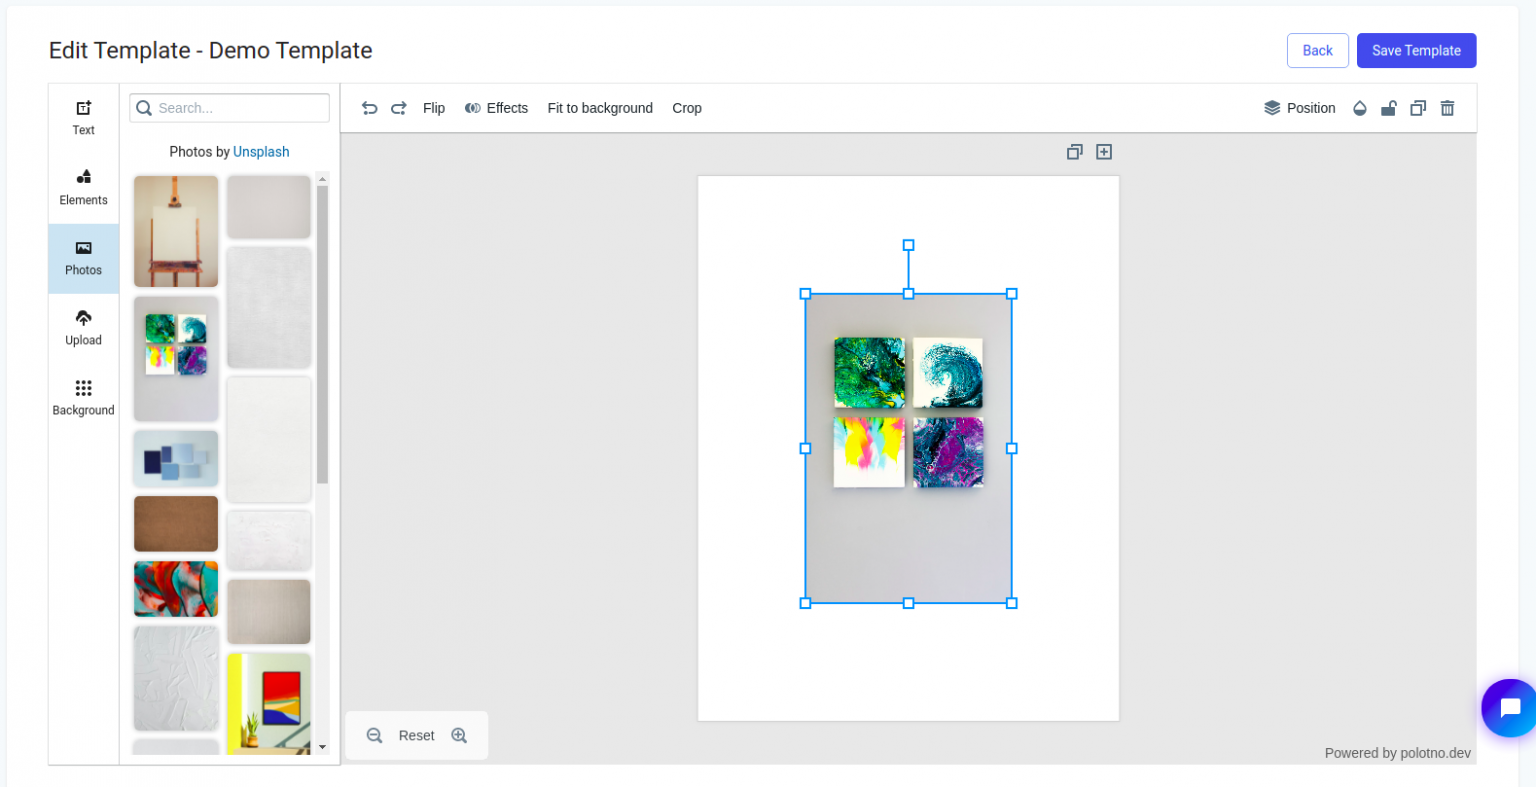
With out contacts selected, both for to and from, we are ready to add our template. To keep things simple, we will just be sending a letter with no variables which has fixed information. In this case, it is usually more appropriate to upload a PDF of your letter using the ‘Upload a PDF’ button, but we will select a template nonetheless. Below is a picture taken from the template editor of what we will try to send, with description ‘Nature Walk’.

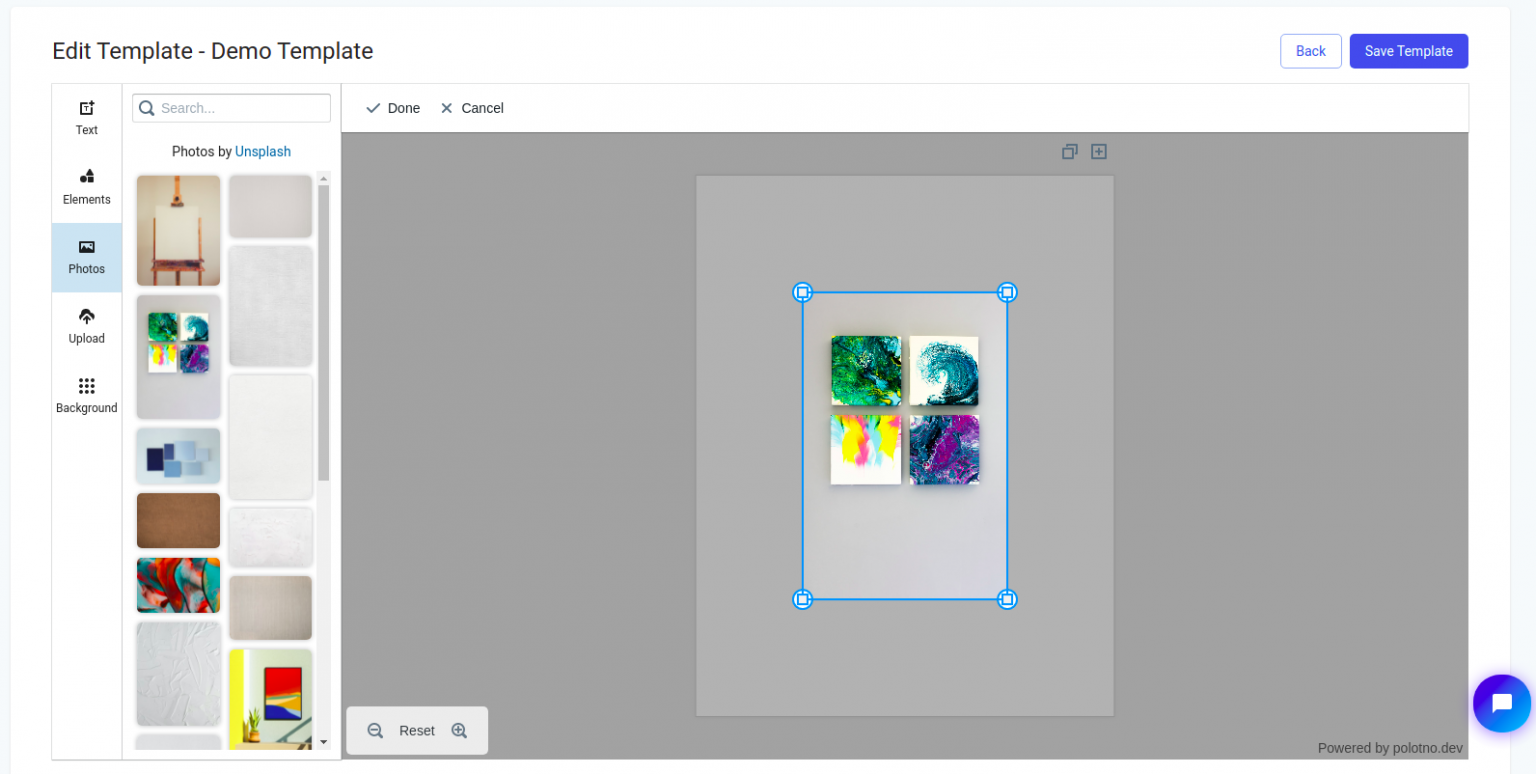
With our template and contacts selected we only have a few options left to choose at the bottom. In the case of this letter, we would like to send with colour so we will select that option. Next, we will add a page for inserting the address into to not overlap our design but will make it double sided so it prints on a single sheet of paper. WIth everything selected, our page should like this.
Next, simply hit the ‘Create’ button and our letter will be ready to go and we will be taken back to the list of our sent letters. We will be returning to understand a bit more about the next steps with our letter in the final section on tracking letters. To see a PDF preview, simply click on the letter and then click on the ‘View PDF’ button when you are at the page on the specific letter. More details on this will be covered in the tracking section.
Sending Letters with Variable Data
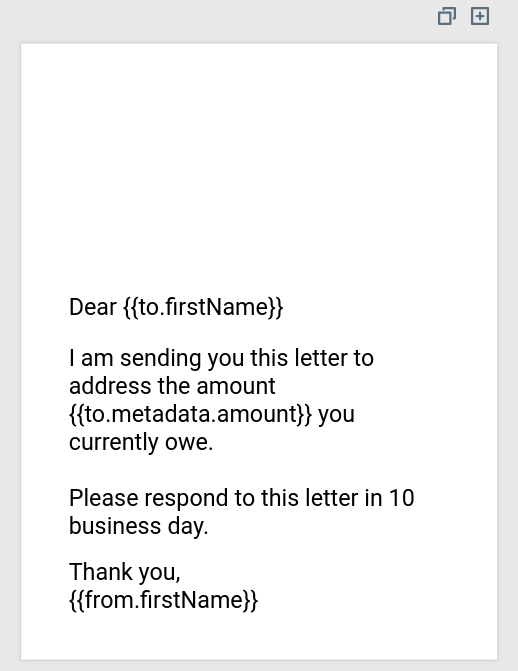
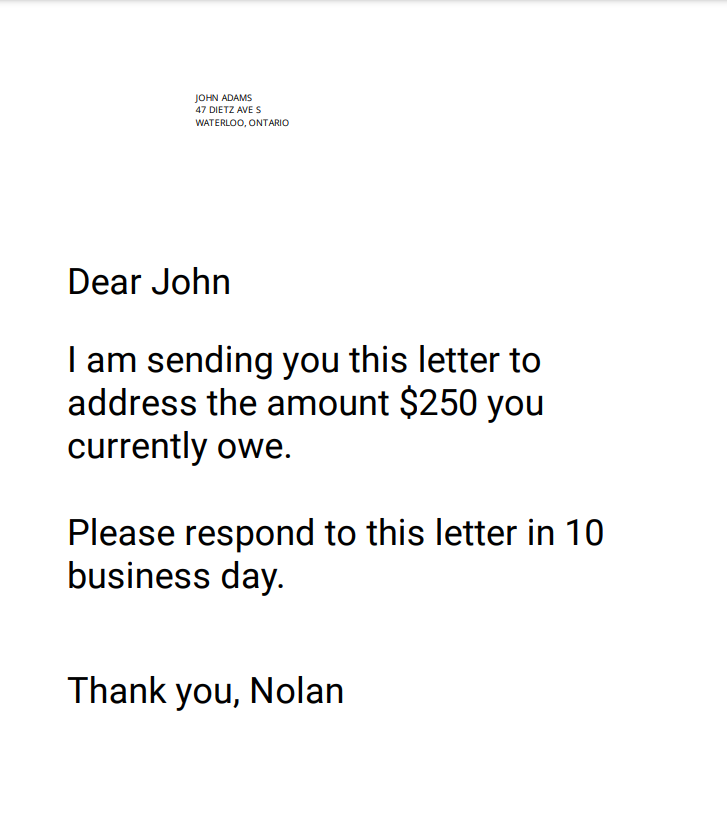
While being able to send a letter with no variable data can be useful, often times we would like to be able to quickly send mail to different contacts with different pieces of information ready to quickly be substituted. In the case of this letter, this is a snapshot of the template I created using the template editor with description ‘Amount Owing’.
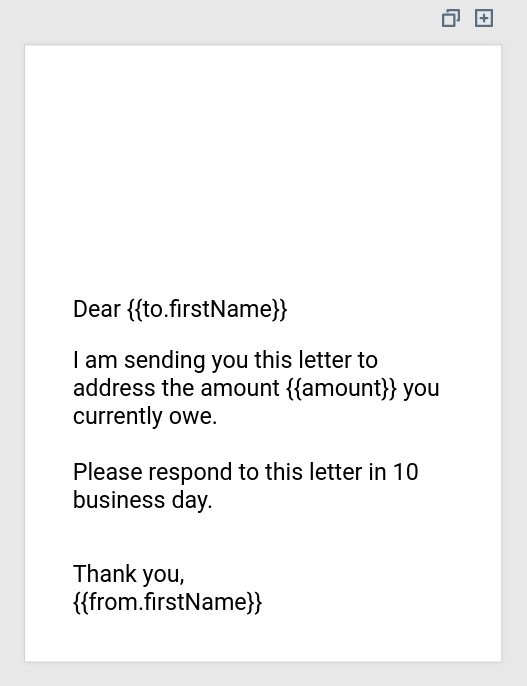
With our template selected, we will notice something peculiar emerge below where we selected our template.
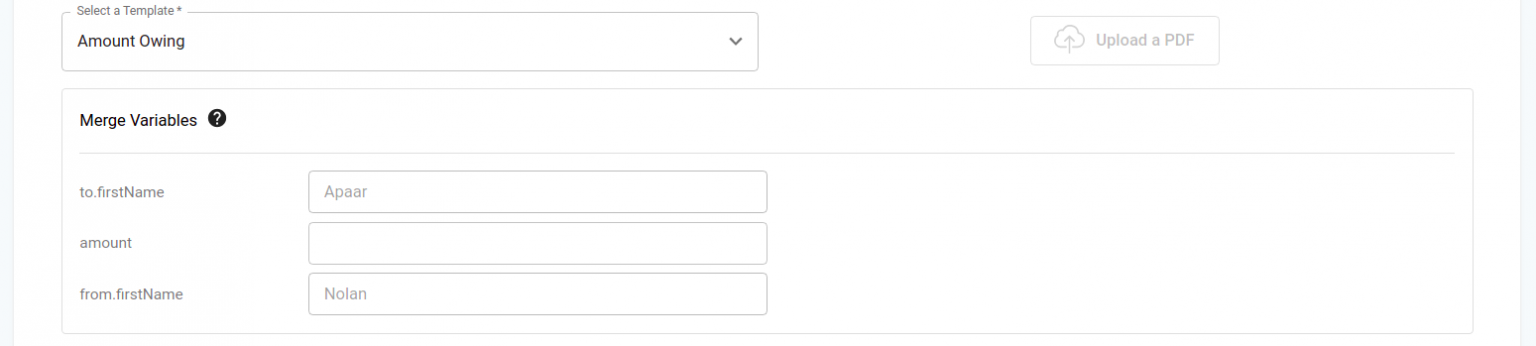
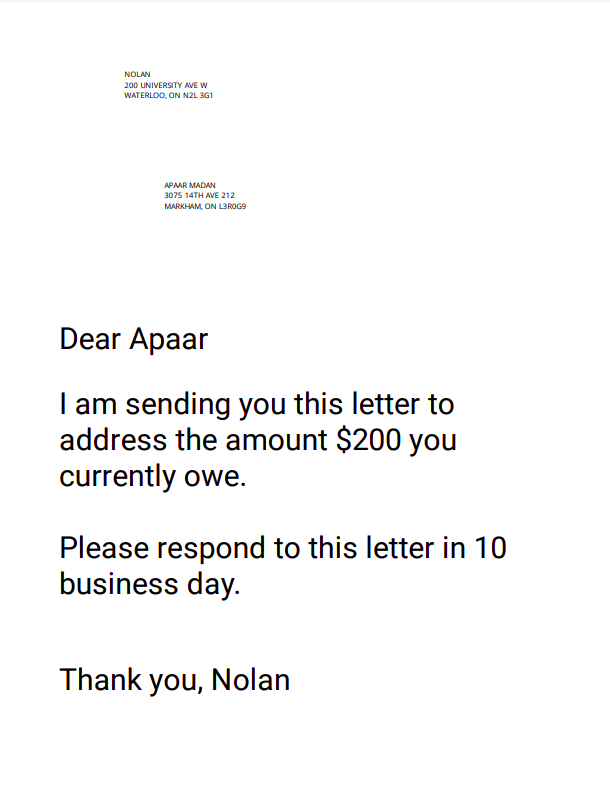
As we recall from the template creation section, we were able to specify variables into our template and this is how we populate those variables. Already, the variables associated with our contacts is filled in and we are not able to edit these. Let’s add an amount ($200) and create the letter with each of the bottom options left unselected. Below is a PDF preview of our letter with the variables filled in.
Sending Letters to Multiple Contacts
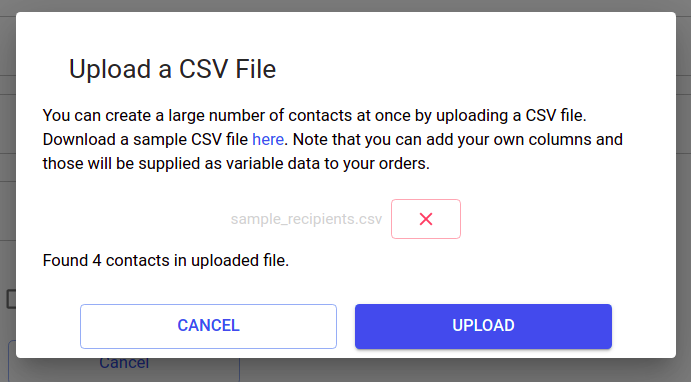
With an understanding of how we can send mail to individual contacts, let’s look into how we can send mail to multiple contacts at a time. To do so, we are going to need a CSV of our list of contacts and use the ‘Upload Recipients’ button.

For properly formatting your contact information, see the example found here. Let’s use this example as our baseline. To adjust it to contain different amounts owed from different contacts, lets use a spreadsheet or text editor of your choosing to remove the columns for ‘variable1’ and ‘variable2’ and add a column for ‘amount’. Under this column, fill in the individual values and then don’t forget to save or export as a CSV file. Adding our example file to the popup which appeared when we clicked ‘Upload Recipients’, we see that PostGrid tells us that it has found 4 contacts.
Next, to make sure the data is populated by the clients information, we need to adjust our ‘Amount Owing’ template by changing `{{amount}}` to `{{to.metadata.amount}}` as additional columns outside of basic information will be added as metadata to the contacts.
Selecting ourselves as the sender and using the ‘Amount Owing’ template, we find all variables populated in the ‘Merge Variables’ section with those of the first contact. Filling this out and clicking send, we see the four letters created. Viewing previews of each of these letters will show you that the information has been filled in just as it had for our previous letter with variables and will be tailored to each specific contact.
Tracking Letters
Reaching this point, we have finally sent our first letter. Naturally, we will want to track our letters and make sure they complete their journeys as well as search through our existing letters. For the next few sections, we will want to navigate back to the letters page by using the navigation panel on the left.
Letter Progress
From our letters page, let’s click on one of the letters we just sent.
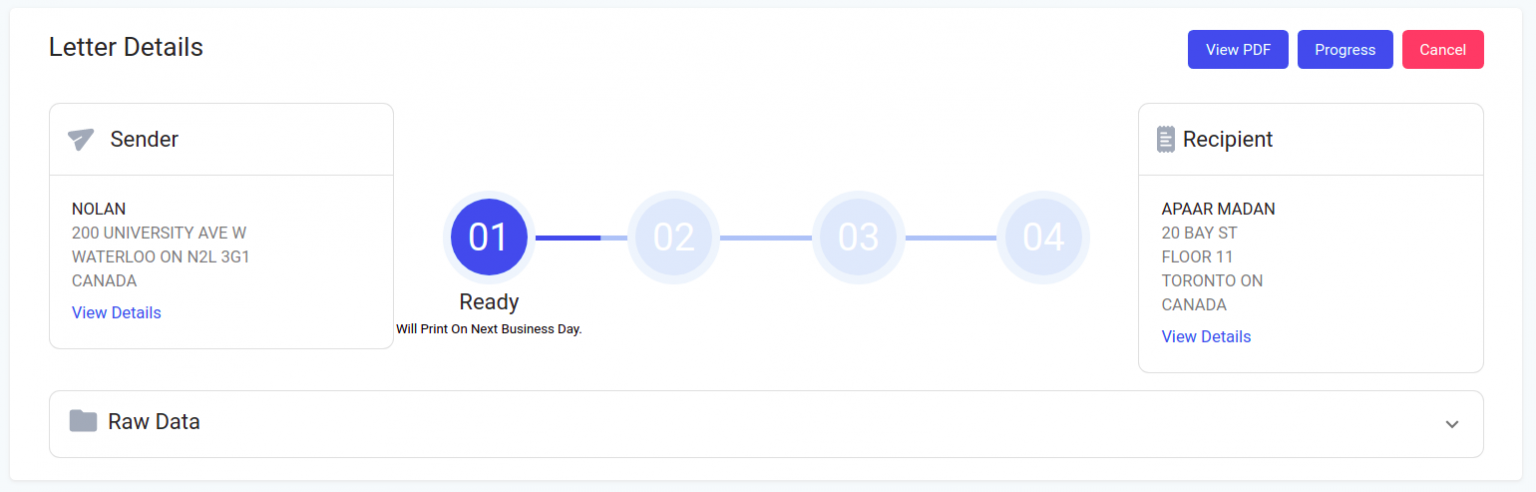
Once there, we are immediately presented with sender and receiver information as well as progress bar. Fortunately, we are in test mode, so we have access to a ‘Progress’ button in the top right which allows us to view each of the stages. Currently, our letter is ready and will be sent off to printers in the next business day.
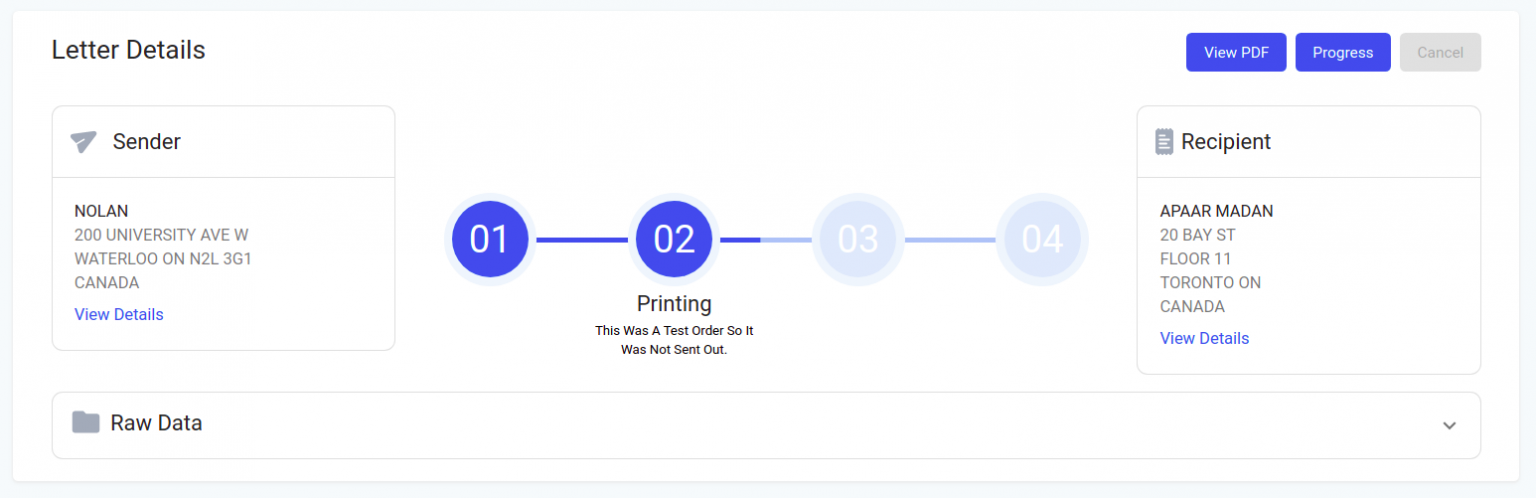
The next stage is printing. If you look where the ‘Progress’ button is, we now find that the ‘Cancel’ button has been disabled. At this stage, PostGrid cannot guarantee that printers have not already sent out your mail for delivery and the letter cannot be cancelled. Fortunately, PostGrid has recognized that we are in test mode and has left us a dialogue below the stage number telling us that no actual mail was sent.
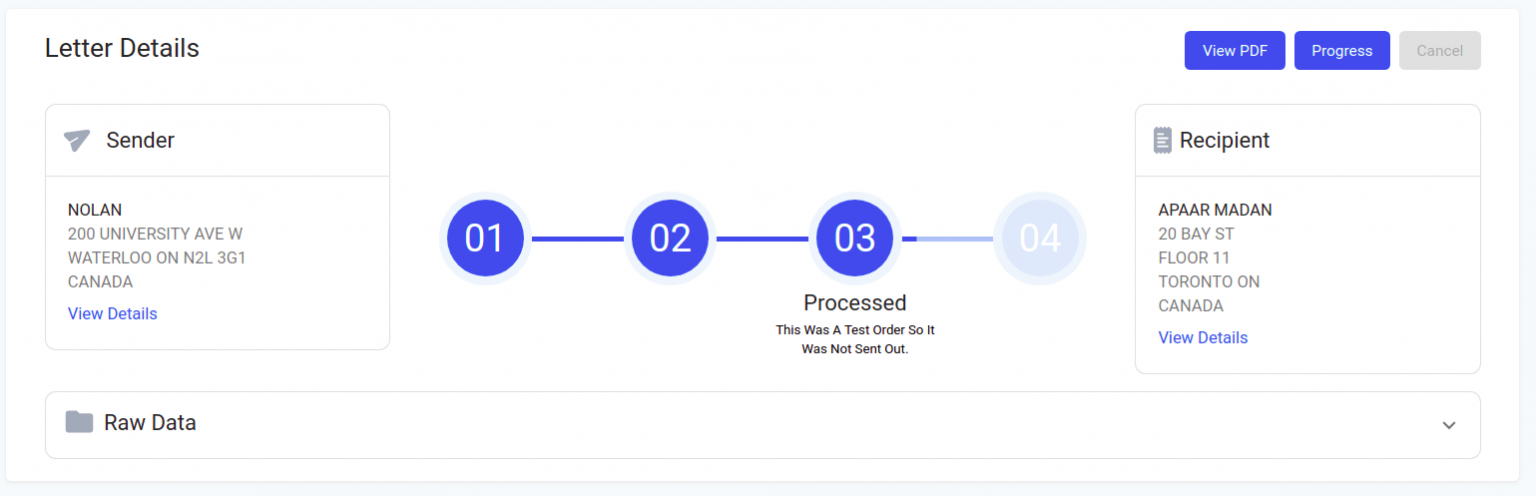
Next, printers will take your mail and have it processed. When the local postal service has entered your mail into their systems, PostGrid will be able to relay you that your mai has been processed and is now awaiting delivery.
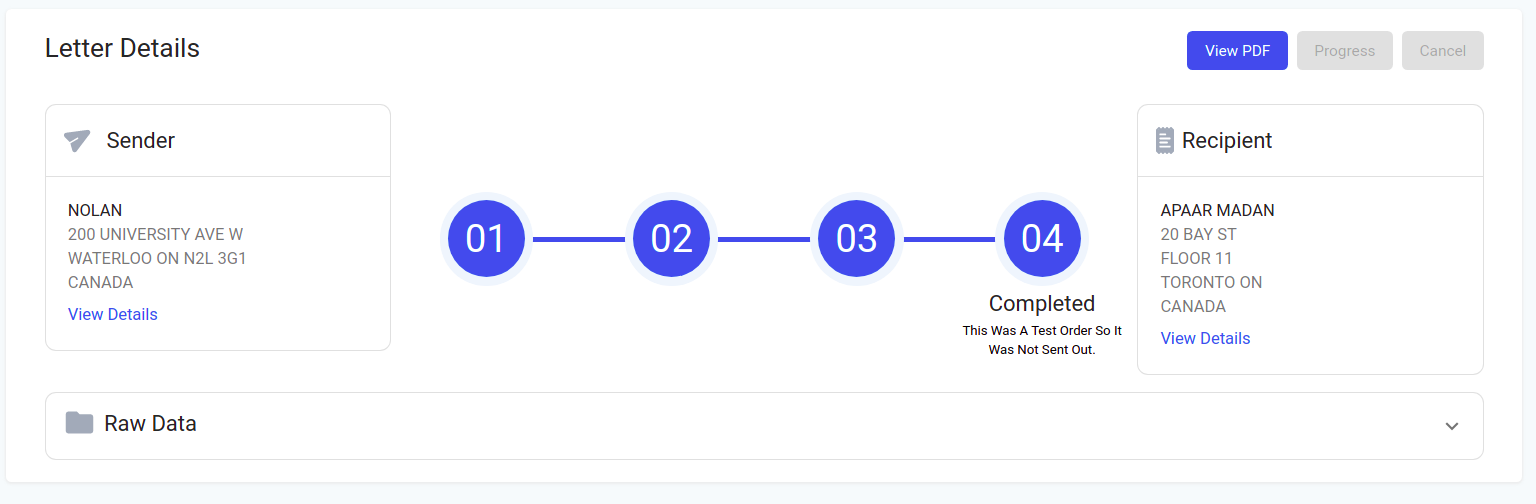
Finally, your letter will have reached the status of completed. This is based on regional estimates of time to completion and not an actual verification of delivery. To receive a tracking number for your mail, you will need to register for our beta service by emailing support@postgrid.com and you will then be able to send certified mail by using our API. For more information on how to send certified mail, see our API guide.
Previewing Letters
Another useful button when viewing sent mail is the PDF preview, which can be accessed by selecting “View PDF”. If you are ever using variable data as we had above, or including the address on the same page as your content, you will want to view your PDF and make sure the data has been filled out correctly and that the address field is not overlapping any content. This PDF is what our printers will receive, so you can be certain that this will be what your recipients receive.
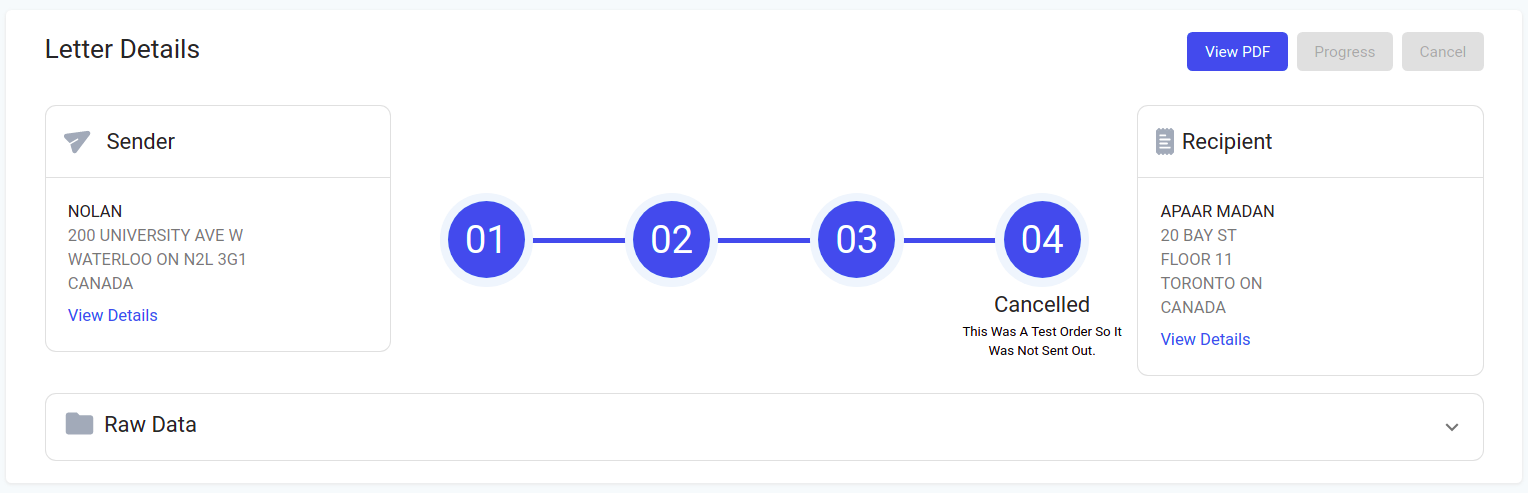
Cancelling Letters
Before letters are sent out to printers, PostGrid offers the ability to cancel your mail. Letters sent from PostGrid will not be sent to printers until after midnight in Toronto. During this period, simply press the “Cancel” button and confirm your choice in order to prevent the letter from being sent.
- Sending Letters with the PostGrid Print & Mail API
- Overview
- Live and Test Modes
- API Keys
- Environment and Setup
- Creating Templates
- Templates as HTML
- Adding Variables to Templates
- Template Creation
- Viewing and Retrieving Templates
- Updating Templates
- Using PDFs
- Formatting Concerns
- Creating Contacts
- Making New Contacts
- Viewing Contacts
- Sending Letters
- Sending Template Letters to Contacts
- Sending Without a Template or Contacts
- Sending PDF Letters
- Adding Values to Template Variables
- Tracking Letters
- Tracking an Individual Letter
- Tracking Multiple Letters
- Letter Progress
- Previewing Letters
- Cancelling Letters
- Resending Letters Safely
Sending Letters with the PostGrid Print & Mail API
When your business requires sending mail in an effective in scalable manner, PostGrid has your solution. In this guide, we will examine how to send letters and create templates using the PostGrid API. For more information on how to use the API, be sure to consult the official documentation.
Overview
There are four stages in the process of sending letters with PostGrid:
– Creating and designing templates
– Creating Contacts
– Sending letters
– Tracking letters and other analytics
Whether you have a small operation with no developers or a large operation with engineers on hand, each of these four stages have tools at a variety of different levels to accommodate. In this guide, we aim to show you how you can use our API to accomplish each of these four stages and how you can safely test out your workflow. Due to the flexibility of the API endpoints, we may actually skip the setup steps of creating templates and creating contacts but this guide will cover how to use the features as well since it generally creates good practice to have the templates and contacts easily accessible even after the mail is sent.
Live and Test Modes
To make sure that your customers are receiving the exact letter you wish to intend, PostGrid offers both a test mode and a live mode. In test mode, actual letters are not sent out but the process of creating orders is completed all the same. This allows you to ensure that variable data is assigned properly and when you preview a letter, it adheres to postal standards and looks exactly as it should. When you are ready to actually send the letters, you can switch to live mode and repeat the sending process with everything set up as before. Letters sent in test mode will not be delivered, _even after switching to live mode_. More details on these features will be discussed in the tracking section.
API Keys
For developers following along wishing to use the API, you will need to know where to locate and how to use your API keys. The keys can be found in your settings on the dashboard, featuring a live key prefixed by `live_sk`, and a test key prefixed by `test_sk`. The live key can be used to carry out actual mail orders while the test key will only send out letters in test mode. More details can be found here, in the official API documentation. With each request, be sure to include the `x-api-key` header with your API key as the value.
Environment and Setup
In this guide, we will be using Node.js as well as the module node-fetch to make our API calls and make it easy to understand how this can be used in the browser as well. For alternative language support, see the official documentation as well. If you have any questions concerning the JavaScript Fetch API, a great resource is the MDN Web Docs. To install this module, simply run
Next, create a new file which we will call `app.js`. As we will be focused on making primarily asynchronous API calls, let’s add some helper functions and constants throughout this document.
To only call the specific functions we want, we will be using the Node.js REPL by running the command
or equivalently on Windows PowerShell
which will load our functions into the REPL and can be called from there. If you name your file something else, be sure to replace `app.js` in the above.
In a Windows command terminal, loading files into the REPL is nowhere near as convenient but can be done if we run `node` to open the REPL and then run the command `.load app.js`. This will populate the terminal with the contents of your file lin-by-line and may take a short period of time to load. As the file grows in scale, you may wish to include any logging at the end of your file as `logAwait(someAsyncFunction())` and run the script in the usual way as `node app.js`.
Also, as you can see from the function `logAwait`, we will be adding annotations to our code to explain what you can expect from each of the parameters being used. For more information, be sure to have a look at JSDoc. If you are familiar with TypeScript, these annotations can be seen as a way to add typing to a JS file without using TypeScript syntax. These annotations will also allow us easy access to autocomplete within our code.
Creating Templates
With PostGrid, all letters require that you either supply a PDF or a template to form the basis of the letter. Templates allow you to dynamically create letters based upon the specifics of a given contact or any other information. For an easy option of creating templates, you can check out our [guide](../template-editor-guide/TemplateEditorGuide.md) on using PostGrid’s built-in visual editor. When actually sending the letter, you only need to use the template’s ID which can be found in the dashboard.
Templates as HTML
Templates consist of a description and some HTML to describe the template itself. There really aren’t too many limits as to what you can do with the HTML you supply the API as long as it is contained in a single HTML file. This would require that any styling must either be done inline as
or by including style tags within the “ such as
Keep in mind that this will be converted to print, so use the print preview feature of your browser for an idea as to how it will turn out. PDF previews of actual letters can be found after creation of the letter. There are some other specifications to abide by, and these will be covered in a later section titled ‘Formatting Concerns’.
Adding Variables to Templates
One of the most useful features of templates is the ability to add variable information. To add variable data to a template, simply add a text element and write `{{variable_name}}`, where `variable_name` can be whatever you wish. There are also some preset variables which fill-in based on sender and receiver information such as `{{from.firstName}}`. Variables may be easily inserted into the HTML such as
Variables may also be used to control styling of HTML elements in this way. such as setting
Actually filling in the data is quite simple and we will show you how to do it in the ‘Creating and Sending Letters’ section. During the template creation phase, you only need to worry about adding in which data may vary from letter to letter as you use the template while PostGrid helps you to take care of the rest.
To know which variables can be filled in from contact information, take a look at the details of a contact to see what information is available. Opening up the ‘Raw Data’, here is an example below.
Variables with nested information can be accessed using `variable.nestedInfo`, such as specifying `{{income.afterTax}}` to access the income after tax which may be stored as
More information on variables can be found below.
Template Creation
With our HTML prepared, we are ready to actually make our request to the server and create our very first template. Don’t forget to retrieve your API key from the ‘settings’ section of the dashboard for this section!
For creating a template, we find in the documentation that our endpoint is to make a `POST` request to `/templates`. In the body of our request, we are going to need to supply the HTML to be used by the template as well as the description we will use to find our template later. In our JavaScript file, let’s add the following.
With our description and HTML supplied, let’s create a function which consumes these two values and produces the server’s response.
With everything set, let’s run our command `node -i -e “$(< app.js)”` to load everything into the REPL. Running our function in the Node REPL and logging it use our function `logAwait` by running `logAwait(createTemplate(templateHTML, templateDescription))`, we should receive something along the following.
If an error occurred, the response `resp` would contain the appropriate status code `resp.status`, while the response object would contain a field `error` which breaks down into `error.type` and `error.message` for more info. Below is an example of a faulty API key with status code `401 (unauthorized)`.
Viewing and Retrieving Templates
If we now wanted to view our template, we will now be looking to make a `GET` request to URL `/templates/:id`, where `:id` can be found in the “id” section found in the dashboard or the response we obtained above. If we wanted to create a function which would retrieve the template with a given id, we could write something similar to the following.
Running the above code, we would expect a response as below.
If we would like to be able to find this template by searching for its description, we need to make a `POST` request to `/templates`, being sure to fill out the search option in the body. For this, let’s create a function which consumes a search criteria and returns the server’s response.
Using the REPL and running `logAwait(searchTemplates(‘This is a test template’))`, we may receive something like the following
This method of search works well when you have something inexact you are looking for. Additionally, PostGrid’s search feature also comes with the ability to parse exact matches by passing in an object which resembles a template where the specified fields will be used in the search for an exact match. Below, we have an example of searching for an exact description. Careful to handle the error with no matching description!
Note that we must use `encodeURIComponent` to translate our object string into a URI compatible string. We could add more fields to produce more exact matches, which could be particularly handy if you added a `metadata` object to your template when uploading as this would allow you to search along all sorts of parameters such as `campaignID`, `clientName`, or anything else specified.
Updating Templates
Using a template’s ID, it is also very easy to update either the HTML or the description of the template. In the above example, notice that we capitalized the ‘T’ in ‘Template’, so let’s fix this. We will begin by constructing a function which consumes a template ID and some options to revise. Following the API documentation, we will be making a `POST` request to `/templates/:id`.
Running the above function in the REPL and logging the result will produce the following when we correct our error.
Finally, we may also want to remove our templates entirely. This is as simple as running a `DELETE` request to `/templates/:id`. Using this function,
we produce the following upon first deletion,
and after attempting again, we will receive the following:
Using PDFs
If you don’t need to create a template but instead have PDFs already ready to send to specific contacts, then you can move right along to the sending part. However, you will still need to read the following section to be sure of the format of the PDF letters you wish to send.
Formatting Concerns
When sending and printing mail, we need to keep in mind where the address will be placed as well as where the margins can be found. In the official API documentation here, you can find the specifics for Canadian letters and for US & international letters. To avoid having the address cover a specific part of your letter, we will see below how we can add an additional page dedicated to just the address.
Creating Contacts
Before we can get started with sending letters, we will need to specify who the letters are from and who they are going to. Although contact creation may be easily done using the dashboard, PostGrid still offers the ability to create and view contacts directly from the API.
Making New Contacts
Before we can make a new contact, we need to know what information a contact consists of.
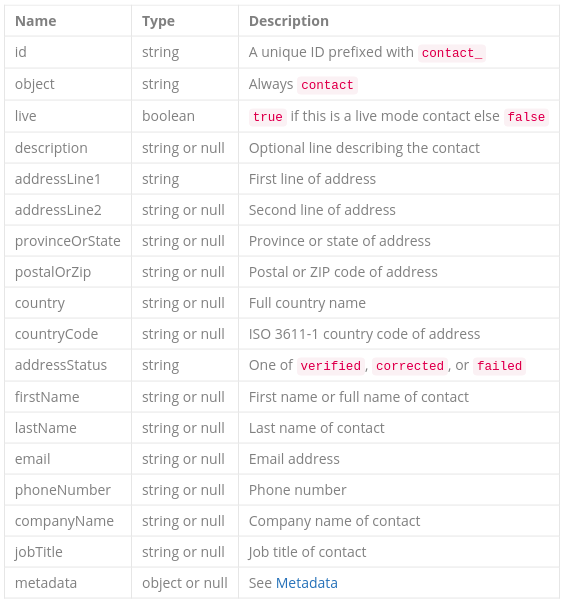
Using the above image or the example image of contact details found in the ‘Adding Variables to Templates’ section, we have a guide as to what type of information we will need to send in order to create a contact. In the above list, every field except for ‘id’, ‘object’, ‘live’, and ‘addressStatus’ are specified upon creation of the contact. Of the fields which pertain to an address, not every field needs to be filled out in order to create the contact as PostGrid can verify and parse the address in order to take a single line address and fill out the contact’s individual address fields.
To keep things simple, let’s create a function to create a contact with a certain first and last name, give them a description, and the address in one line. Looking at our API documentation, we need to make a `POST` request to `/contacts`, so let’s do so.
Running through the information ‘John’, ‘Smith’, ‘This is a test contact’, and ‘200 University Ave W, Waterloo, Ontario’, we receive back the following.
Notice that the address information is completely different than what we entered. This is because we used our test key, so the contact will be in test mode and have this default address which is set to verified by default. Running this API call again with our live key, we will instead get what’s below.
Now our addressStatus is ‘corrected’ to fill in our missing information such as the country and postal code and the address information reflects what we sent the server.
When it comes to contact creation, do remember that we can fill-out the address information directly or add more data to our contacts such as ‘jobTitle’ or ‘companyName’. The fields added to our contact here were just for simplicity.
Viewing Contacts
As with templates, we have very similar options for viewing contacts. We may either examine an individual contact by sending a `GET` request to `/contacts/:id`, or list contacts by sending a `GET` request to `/contacts`. As these work so similarly to their equivalent requests to `/templates` and `/letters`, we will only show a brief function for retrieving contact information with a given first and last name.
Sending Letters
With our contacts and templates setup, we are ready to send some (test) mail. In this section, we will cover each of the different ways you can send mail by making API calls. Over these sections, be sure to use the test key when following along to make sure that you do not send any real mail.
Sending Template Letters to Contacts
The quickest and easiest way to send mail is if you have the contact IDs and template ID for the mail you wish to send. Examining the documentation, we can achieve this with a simple `POST` call to `/letters`. Let’s now create a function to consume some contact IDs and a template ID and create a letter.
Using this function, let’s now send a letter with some given contacts and the ID for the template associated to the image below, which was made in the template editor.

Previewing this letter (more info on this below), we find the following.

Unfortunately, it seems as though the address placement has blocked some of our design and our colors have disappeared. We can fix this with some additional fields we can add to the body of our request. Specifically, we need to tell the API the values of `addressPlacement`, `color`, and `doubleSide`. If we also take a look at the dashboard to find this preview, we are missing a letter description, which can be added with the `description` field. Let’s extend our function to accommodate for these options.
Using this function and setting `blankPageForAddress` to `true` and `color` to `true`, our preview will now include two pages with our second page being the template shown in color and listed with its description.
Sending Without a Template or Contacts
In case you wished to skip the previous two sections and wanted to jump to sending letters straightaway, or already have your template HTML and contact info on hand and don’t want to create these ahead of time, PostGrid’s API allows you to send letters in one step. Using the same API endpoint, all we must do is switch from setting `to` and `from` to contact IDs to setting these values to contacts themselves and setting field `html` instead of setting the field `template`. For more information as to what you can fill out the fields `to` and `from` with, see either the official documents for what a `Contact` type is or see the creation of contacts above.
In the return of such an API call, you can view the response to see the contact information and HTML provided. If we were to create a contact with information
and send a simple HTML text as `’Hello friend’`, we receive the following.
Notice that a contact is created for each the `to` and `from` contacts with the address status checked and corrected where applicable. Since we are in test mode, our letter will inform us that the addresses are verified but they aren’t actually verified unless we are in live mode. We can also mix-and-match sending with or without templates/contacts suiting your needs.
Sending PDF Letters
If you would like to avoid using templates altogether and already have some PDF files handy, PostGrid offers you two ways of achieving this: using a PDF file directly, or using a public URL to a PDF file. For either method, we will again be sending a `POST` request to `/letters`. Starting with the first of the two, we will need to add the line
to the top of our file `app.js` in order for us to be able to access the local filesystem. Next, let’s add in our function which consumes some contact IDs, the path to our file, and whichever name we’d like to give our file.
Notice that in this case we will have to use the `FormData` object to upload our file. Similarly, if we were to send our request as we had for the other functions, we can easily send a letter with a publicly accessible link to our PDF.
Adding Values to Template Variables
Now that we’ve sent some basic test letters, let’s try sending some letters containing variable data. What gives you the ability to add values for the variables set in the HTML editor will be the field `mergeVariables`. For our example, we will be using the template below.

From the sending process alone, we will not have to worry about informing the API of the values of `to.firstName` or `from.firstName` as these will be found from the respective contact information. That just leaves us with providing the value for `amount`. Let’s create a function to consume an amount owing as well as the contact information of the sender and receiver.
After sending the letter, we find that everything fills in nicely into our PDF preview.
If you wanted to associate the variable `amount` to individual contacts without having to store a table of contacts in your own database, you can add the variable `amount` to the metadata of each contact and revise the variable in the template to `{{to.metadata.amount}}` instead of `{{amount}}`.
Tracking Letters
With your mail sent, it is now to time to track and view your letters to make sure that everything is in order and that everything sent successfully.
Tracking an Individual Letter
Our first task will be to retrieve a singular letter. For this section, it will be important that you have kept the ID of your letter which was returned by the API when it was created in the previous section. If you did not record it, or would not like to save this information, we will go over the search functionality in the next section to see how you may still receive the information on your letters without saving the ID. In order to obtain the information on our individual letter, we will need to send a `GET` request to `/letters/:id`. Let’s design a very basic function to perform exactly this.
Let’s pass the output of this function through `logAwait` to see what we get.
In the above, we see that we have access to all of the information of the letter including information regarding the contacts, the template, variables included, and many more. Discussed further in the ‘Letter Progress’ section will be the field `status`, and in the ‘Previewing Letters’ section, we will be interested in the field `url`.
Tracking Multiple Letters
In addition to an endpoint for retrieving exactly one letter to view, PostGrid also offers the ability to list letters to analyze multiple at once. When combined with PostGrid’s search functionality, you will have a very powerful tool at your hands to find letters with specific contacts, status, or even arbitrary information stored in the `metainfo` field of the letter.
Retrieving multiple letters will require a `GET` request to be sent to `/letters`, where we will default our query parameters to `skip=0` and `limit=10`. By incrementing the value of `skip` by multiples of `limit`, you can paginate your results to iterate over all possible responses. The query parameter of interest for us will be `search`, which can either be a simple string or an object containing exact matches for certain fields.
Using the above, let’s take a search with the string ‘0’ to see what the response object will look like.
In this case, we found no letters, but we can see the general response to a list request. In the `totalCount` field, the number there will be the total amount of results in your search regardless of what `limit` is set to, which is actually the maximum number of results you will be sent in the response. This way, you can determine what maximum value of `skip` to use in order to view all results. Contained in the `data` field will actually be a list of all the letters matching your search in the range determined by `skip` and `limit`.
As an example of how to get a hold of this, let’s suppose we want to send letters on behalf of customers who have a specific ID. To allow creation of letters, here is a basic function which will associate a customer ID to the metadata of the letter.
Now if we would like to return some letters sent by this customer, it is as simple as using the following function.
Letter Progress
In the above return values to our API calls, notice that we have a field `status`. This value can be one of:
– `ready`
– Upon successful creation, our letter is ready and will be sent off to printers in the next business day.
– `printing`
– The next stage is printing. If you look where the ‘Progress’ button is, we now find that the ‘Cancel’ button has been disabled. At this stage, PostGrid cannot guarantee that printers have not already sent out your mail for delivery and the letter cannot be cancelled. Fortunately, PostGrid has recognized that we are in test mode and has left us a dialogue below the stage number telling us that no actual mail was sent.
– `processed_for_delivery`
– Next, printers will take your mail and have it processed. When the local postal service has entered your mail into their systems, PostGrid will be able to relay you that your mai has been processed and is now awaiting delivery.
– `completed`
– Finally, your letter will have reached the status of completed. This is based on regional estimates of time to completion and not an actual verification of delivery. To receive a tracking number for your mail, you will need to register for our beta service by emailing support@postgrid.com and you will then be able to send certified mail by using our API. For more information on how to send certified mail, see our [API guide](./LetterSendingGuideAPI.md).
– `cancelled`
– Before letters are sent out to printers, PostGrid offers the ability to cancel your mail. Letters sent from PostGrid will not be sent to printers until after midnight in Toronto. During this period, simply press the “Cancel” button and confirm your choice in order to prevent the letter from being sent.
When working with test letters, you can actually force a letter to go through these steps. To perform this, simply make a `POST` request to `/letters/:id/progressions`.
Using the function above, progressing a letter will update the status and will return back the `letter` object with the updated status. Progressing a completed letter will leave you with an error message, as will progressing a non-existent letter, a live letter, or a cancelled letter.
Previewing Letters
When viewing the API response to any `GET` request to the `/letters` endpoint, you will note that each `letter` object will contain a field `url` populated with a web address. This URL will allow you to download PDFs of your letters in order to make sure that template variables have been filled out correctly, that the address region doesn’t block the content of your letters, among other reasonable checks. These links can be opened in your web browser to begin a download.
Cancelling Letters
Before a letter reaches the status of `printing`, PostGrid offers you the ability to cancel your mail. Be aware that mail that has reached the status of `printing` has been sent to our printers and could already be out for delivery, so before this is the last time we can guarantee that your letters will not be sent. To cancel letters with the API, all you need to do is make a `DELETE` request to `/letters/:id`. Below is a simple function which consumes a letter ID and cancels the order.
Upon a successful cancellation, you should receive the same response as if you had made a `GET` request to `/letters/:id`. However, when a letter has progressed too far or has already been deleted, this will be the error message you receive.
Resending Letters Safely
In rare cases, letters may not be returned when listing or you did not receive a response from your request to create a letter. In this case, you may want to resend your letters without worrying whether or not your previous requests were fulfilled. For such cases, PostGrid’s API gives you the ability to make an idempotent request to create letters by supplying a unique key in the header `Idempotency-Key`. Although you can designate this key however you would like, it is recommended that you using V4 UUIDs, more of which can be learned about [here](https://en.wikipedia.org/wiki/Universally_unique_identifier).
With the above function, so long as the `idempotencyKey` remains the same, calling this function repeatedly will not create additional mail after it successfully reaches our servers. This will remain true even if you try to change the contacts or the template, and even would remain true if we tried to send a request with any other different option.
Navigating the Template Editor
If you don’t already have an HTML format ready to paste or find it a hassle to use markup, PostGrid comes with its very own built-in editor. To use the editor, click the ‘Build using Template Editor’.
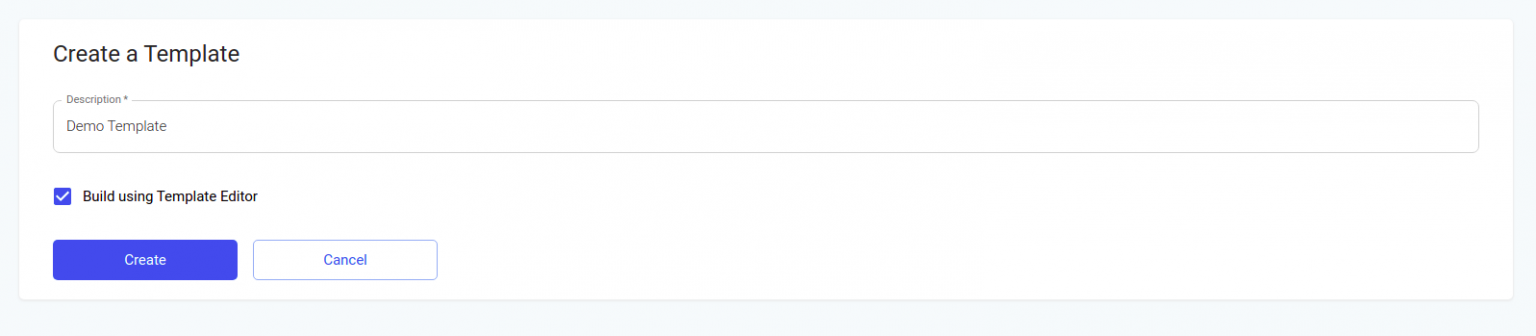
Be sure to add a description, then hit ‘Create’ to continue.

Next, select a collateral type before continuing on to the editor. In this guide, we will focus on creating a letter (sized appropriately for Canada and the US), though options exist for creating postcards of various sizes. Once you have your collateral type selected, you are ready to move on to the editor.
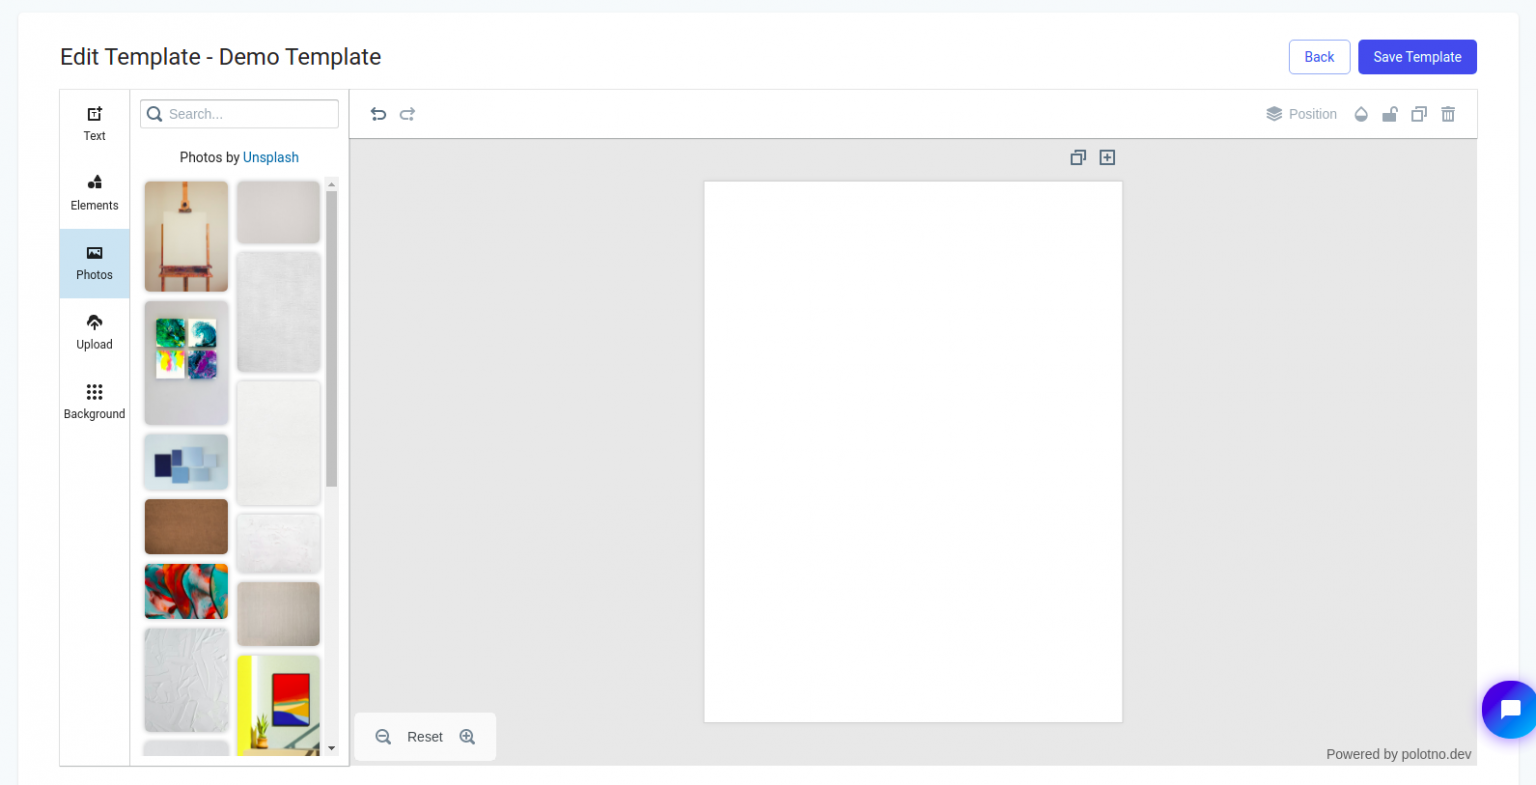
Once you are in the editor, we may immediately notice that our page is set up in the correct dimensions with elements along the left we may add to our blank canvas. Let’s take a brief look at each feature in this intuitive drag-and-drop editor.
Basic Functions
Each element is added to the canvas by clicking on the desired element on the right hand-side. Once added to the canvas, you may modify the element in a variety of ways. Besides adding elements, you may zoom in or out of the letter without affecting the size of everything by using the magnifying glass icons in the bottom left. The ‘Reset’ button simply restores the amount of zoom to the default level.
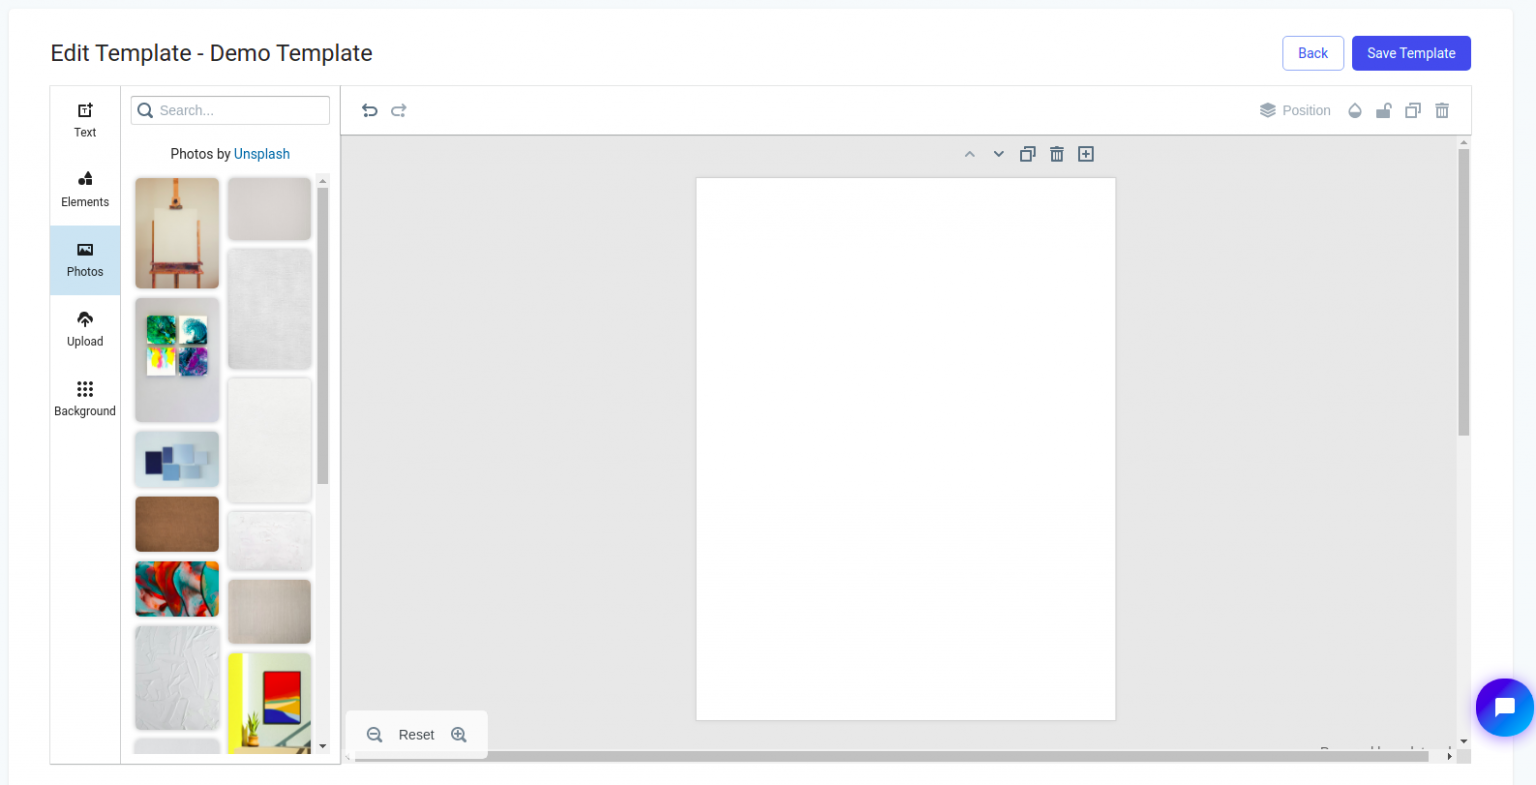
To add or duplicate the current page, use the icons in the top right corner. Navigating to different pages is as easy as scrolling or using the new arrow buttons which appear in the top-right corner, just above the page. Additionally, pages may be deleted by using the trashcan icon in the top right corner which appears once multiple pages are being used. Pictured below is what your editor should look like after a new page is added.
Adding Text
To add text, navigate to the text section to reveal some set examples of text elements to add.
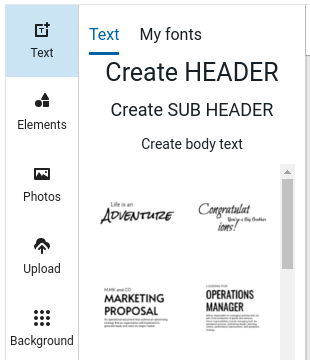
To add a given text element to you letter, simply click on the example. All examples are editable to put your own words in while retaining the styling.
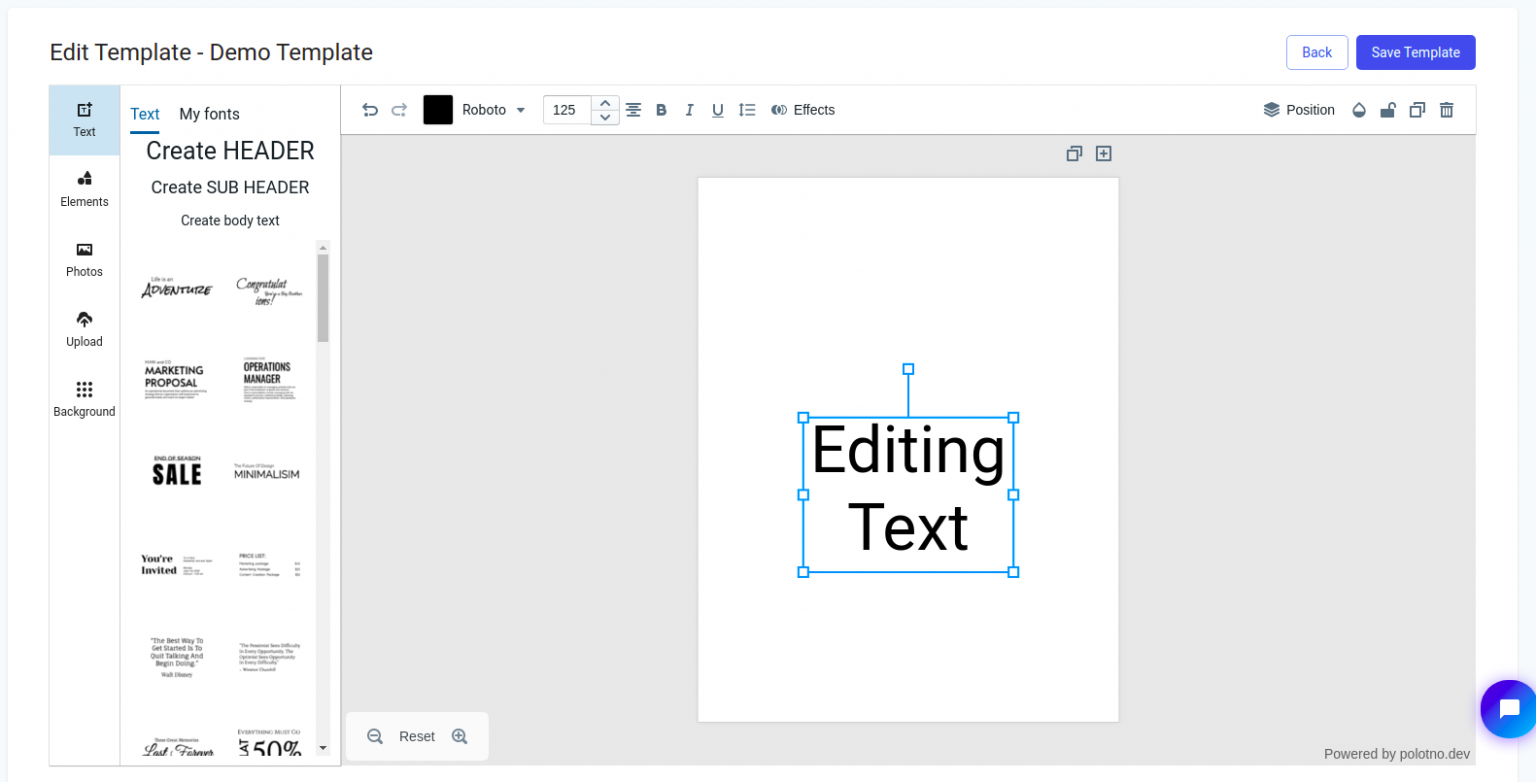
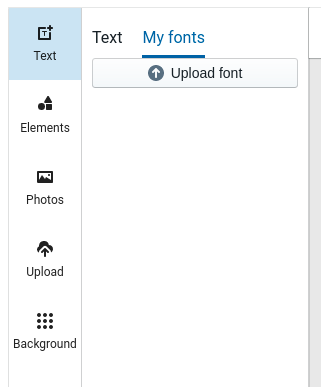
In the above example, we have selected ‘Create HEADER’ and put our own text into it. While editing text, note that along the top of the editor that we may now find our basic text editing options such as alignment, colour, font, font size, and more. If you’d like to use alternative fonts, note that you may upload a font by selecting ‘My fonts’, which resides on the top-left.
After selecting ‘Upload font’ and selecting your downloaded font, the downloaded font will appear below the upload button as so.
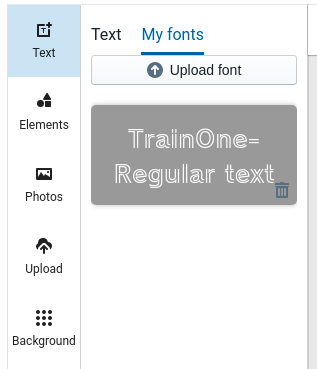
In this case, the font selected was ‘TrainOne-Regular text’, which can be downloaded from Google fonts.
Adding Images
Aside from text, you would most likely want to add images. To add images to your canvas navigate over to the photos tab along the left-hand side.
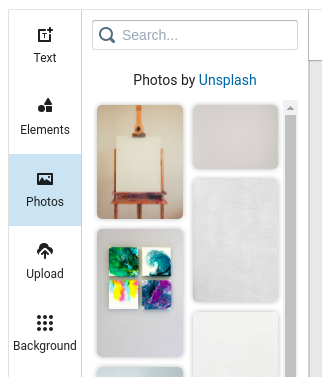
From here, simply click on the desired photo to add to the canvas.
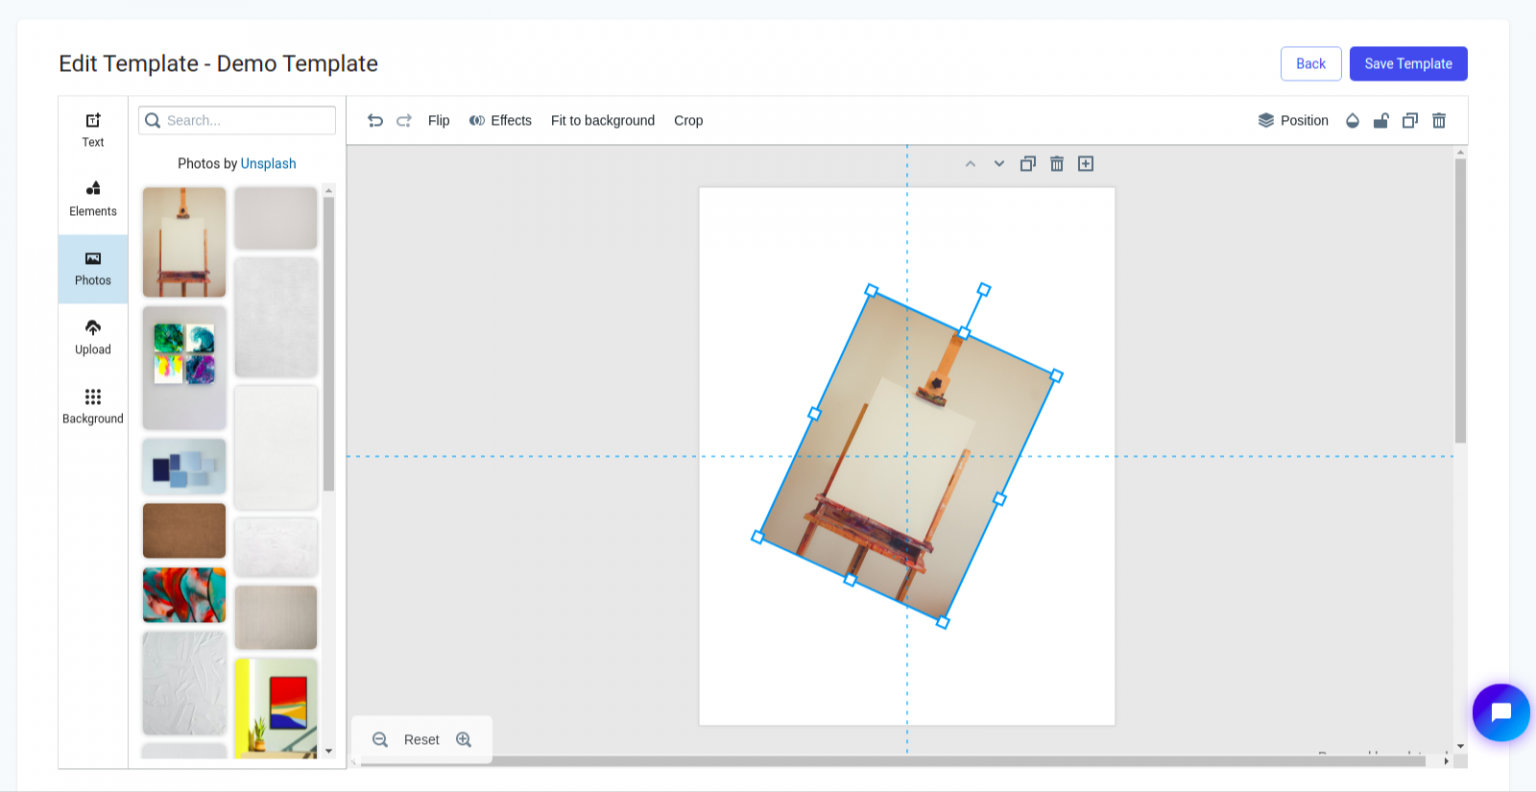
With your photo on the canvas and selected, notice that we have some new options compared to editing text. Unique to editing images, we are able to flip our image (horizontally or vertically), fit it to the background, as well as crop the image. You may also open the crop tool by double clicking on the photo.
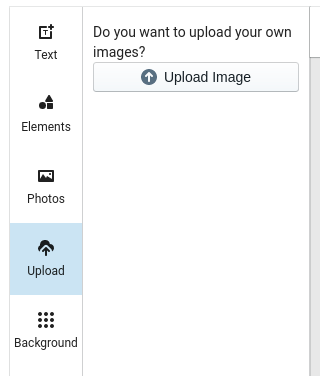
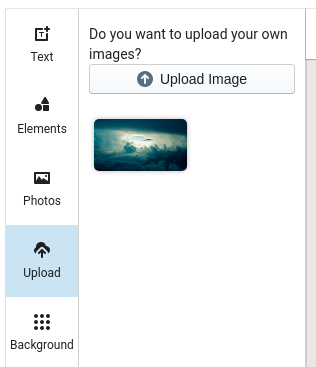
If we wish to use our own images, navigate over to the ‘Upload’ tab found on the left.
When you select an image, it will appear below the ‘Upload image’ button as so
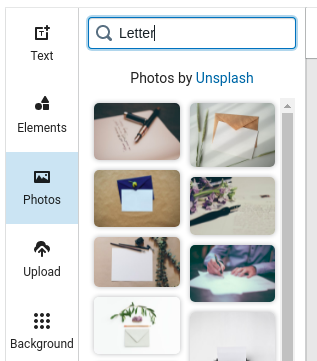
Simply click on the image to add it to your canvas and you will have access to the same options as we had for any other image. If you need to find a photo to add, you can use the search bar on the ‘Photos’ tab in order to find an image. As an example, here’s what I found when I searched ‘Letter’.
Adding Icons
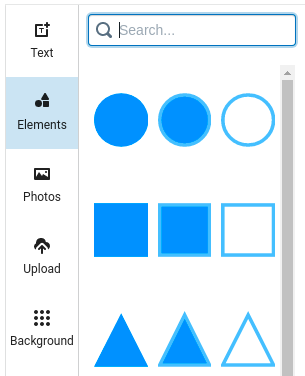
In addition to adding images to the canvas, you may place a host of different customizable icons which can be found in the Elements tab.
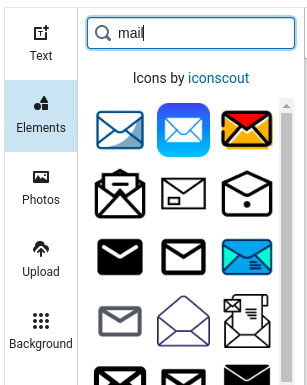
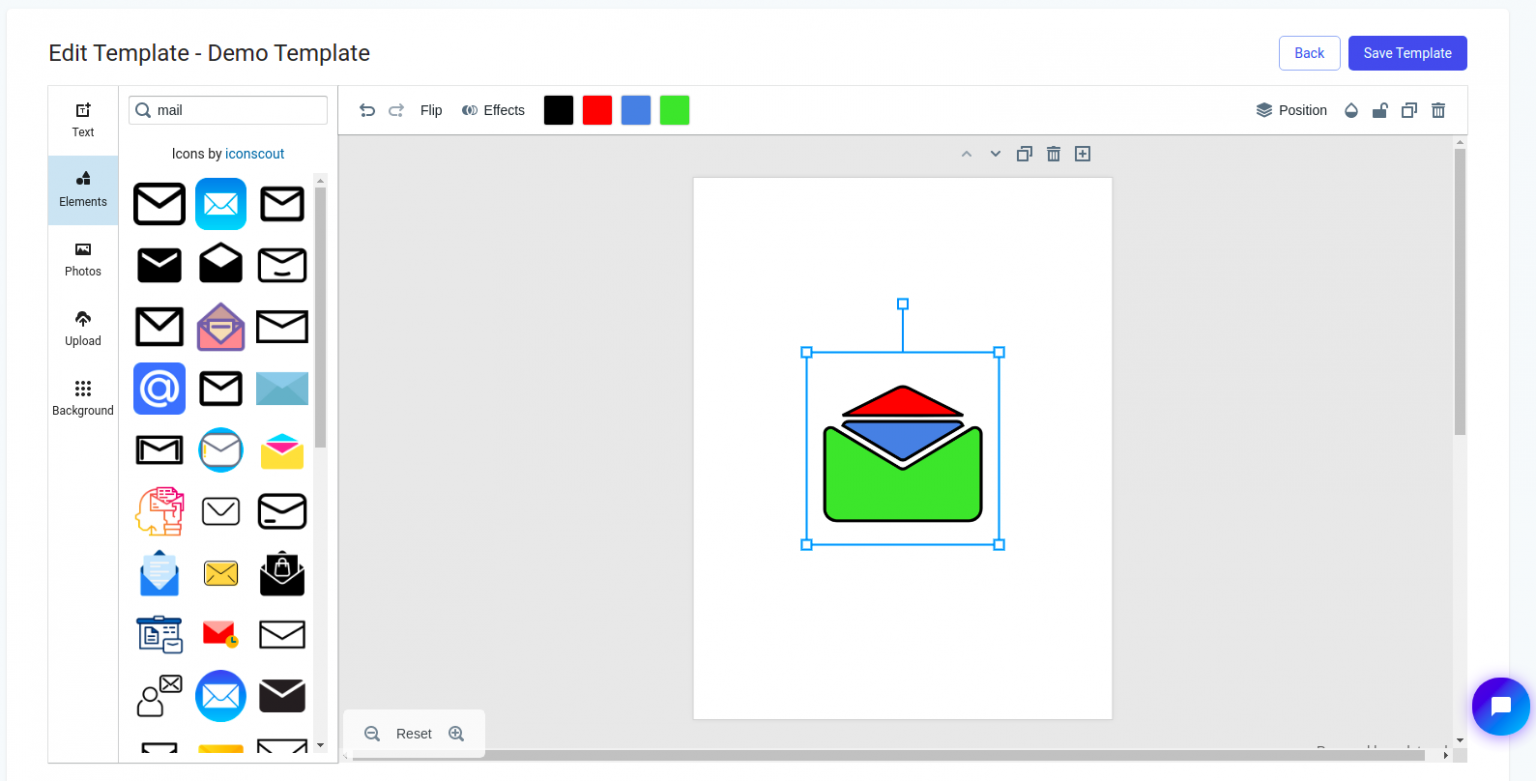
If you are looking for a specific shape, you can use the search functionality to find what you are looking for. Here is an example of what you can find when you search for ‘mail’.
Once your icon has been added to the canvas, some interesting customization options emerge.
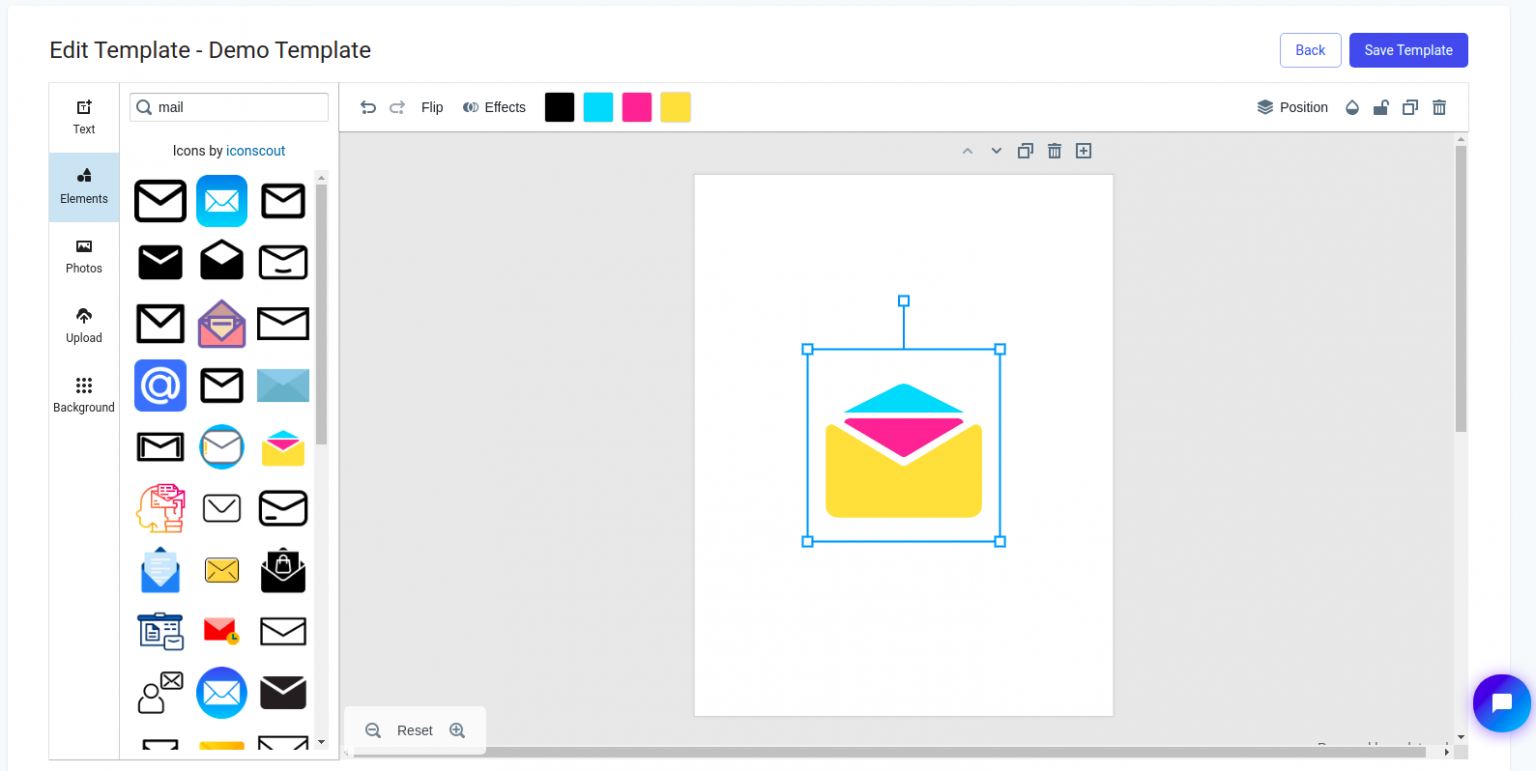
Other than the ‘Flip’ functionality which behaves identically to that when editing photos, we may see a row of colors along the top. These colors constitute the palette used to color the icon and may be customized to your liking. Here is an example of the same icon with new colors.
Placing and Sizing
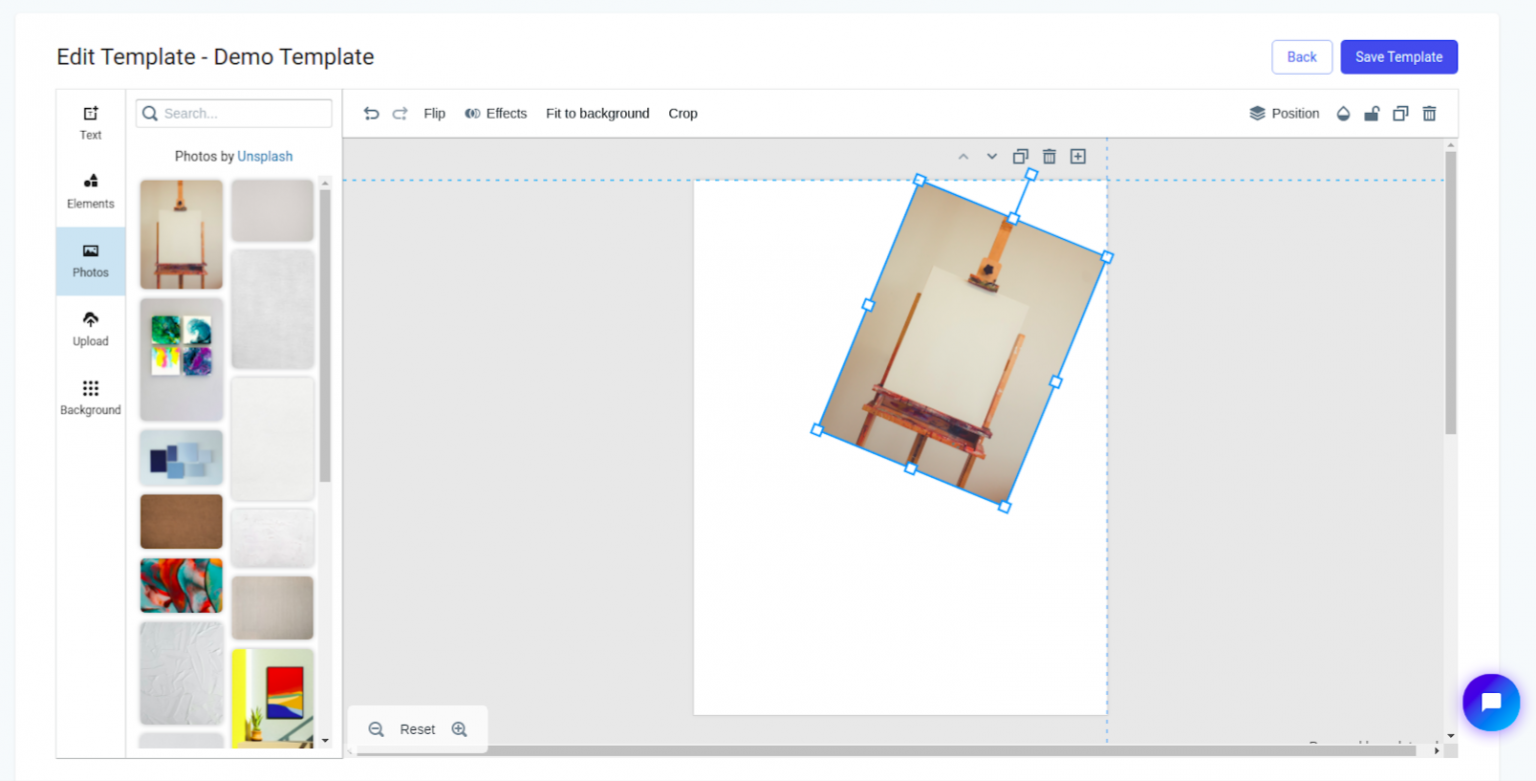
With elements on the canvas, it is easy to move them around and resize them to your desire. The simplest way to move the elements around the canvas is to simply click and drag and the element will follow your mouse. You may also use arrow keys on selected elements in order to move elements with more precision.
When using the mouse, the template editor comes with placement guides to help center images as well as line up along the edge.
In addition to this, opening the position tab will reveal a host of other helpful position information as well as layer controls to change which elements appear above others.

Also in the same area at the top-right of the editor are a few other helpful tools.
– The half-filled drop allows you to edit the transparency of the element
– The lock allows you to prevent further changes to the element and can be enabled or disabled
– The square-over-square icon duplicates the element
– The trashcan icon will delete the element, which may also be done using the backspace and delete keys.
Crucial to editing elements asides from the position is also the size and orientation. With an element selected, you may use the white squares found on the light-blue box around the icon in order to control the size. The box which extends along a line directly above the element allows you to control the rotation of the object.
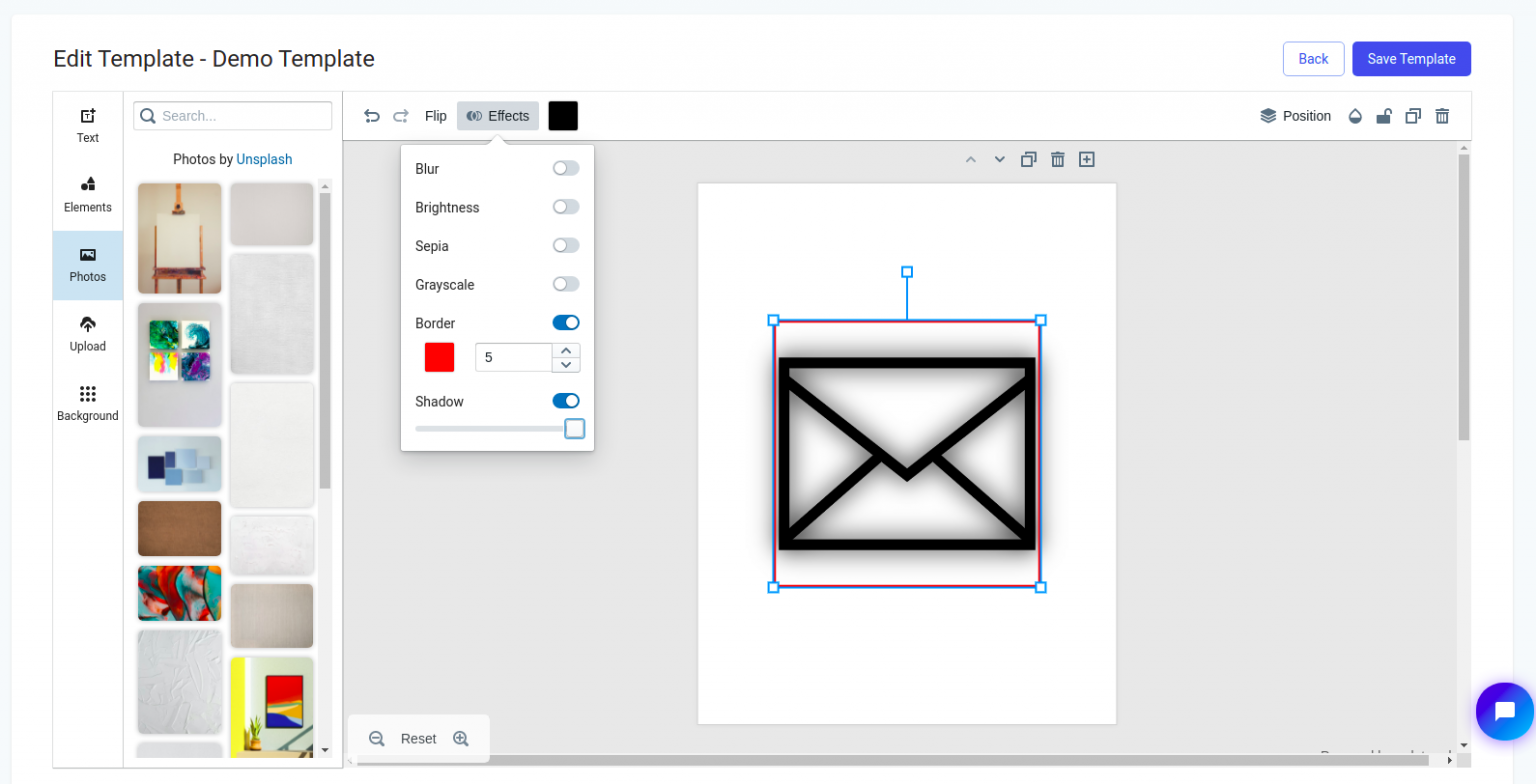
Adding Effects
Finally, we arrive at further manipulations which can be done to the elements added to the canvas. Whether adding text, images, or icons, there exists the option to add effects.
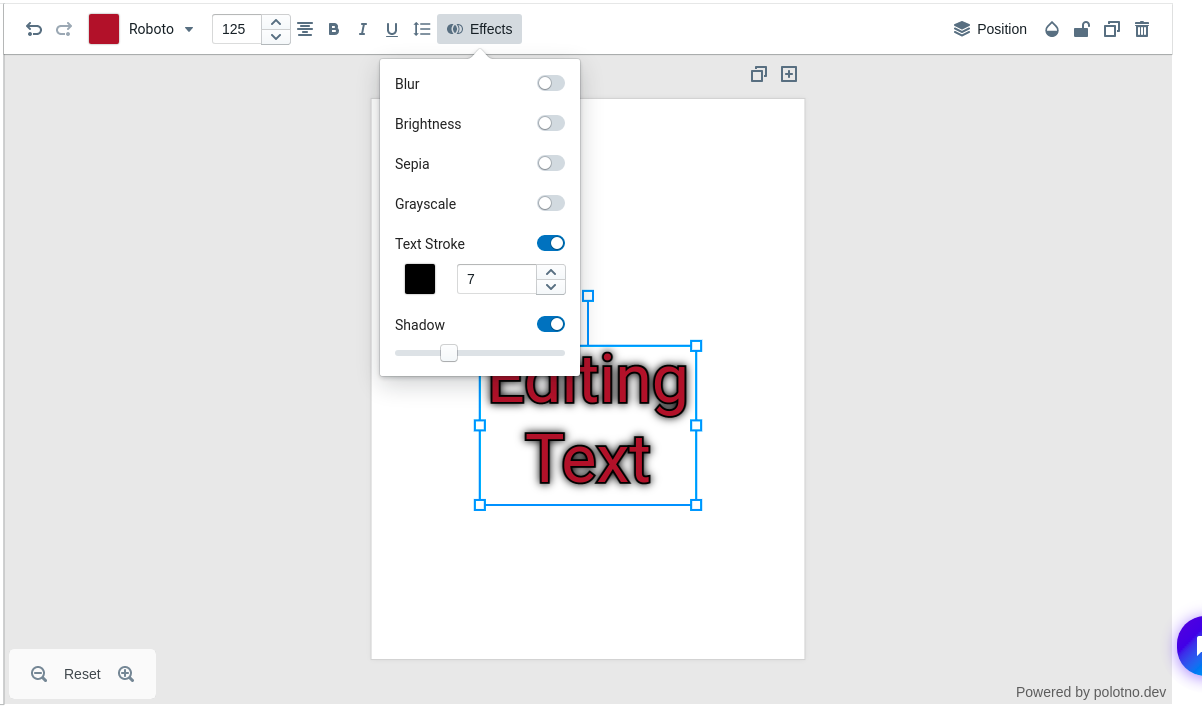
When editing text, we are given the following options:
– Blur: use a slider to determine amount to blur the text
– Brightness: use a slider to change the brightness of the text color
– Sepia: toggle a sepia filter over the text
– Grayscale: toggle a grayscale filter over the text
– Text Stroke: Select a color and width of outline around text
– Shadow: use a slider to determine the size of shadow behind the text
For photos and icons, the effects options and functionality is nearly identical except for ‘Text Stroke’ which is replaced by border, sharing a color and width selector. For icons, shadows follow the outline of the icon and not just behind the icon as it behaves for pictures. The border will be rendered on the inside of the light-blue rectangle around the icon which appears when you select the icon to edit.
We integrate with the
platforms you love
Connect the email verification API to check emails in real time. If you need to clean your list in bulk, just import, validate, and then export it backto your platform.
Ready To Get Started?
Start transforming and automating your offline communications with PostGrid